IL License Number: 104.017181

Holda Construction’s 11-Step DIY Roof & Attic Inspection Guide

Practical Ways to Identify Hidden Problems Before They Become Expensive Repairs

Most major home failures do not happen suddenly. They develop slowly, often over years, while giving visible and detectable warning signs along the way. Unfortunately, many homeowners are never taught how to recognize those signs or understand what they mean.
This checklist is designed to change that.
The inspections below require no specialized equipment, no technical background, and no climbing on the roof. In most cases, careful observation from the ground, the attic, or inside the living space is sufficient. When these checks are performed periodically, they allow homeowners to identify moisture intrusion, air leakage, insulation failure, and ventilation problems early—when repairs are still manageable and relatively inexpensive.

Safety Requirements (Read Carefully Before Proceeding)

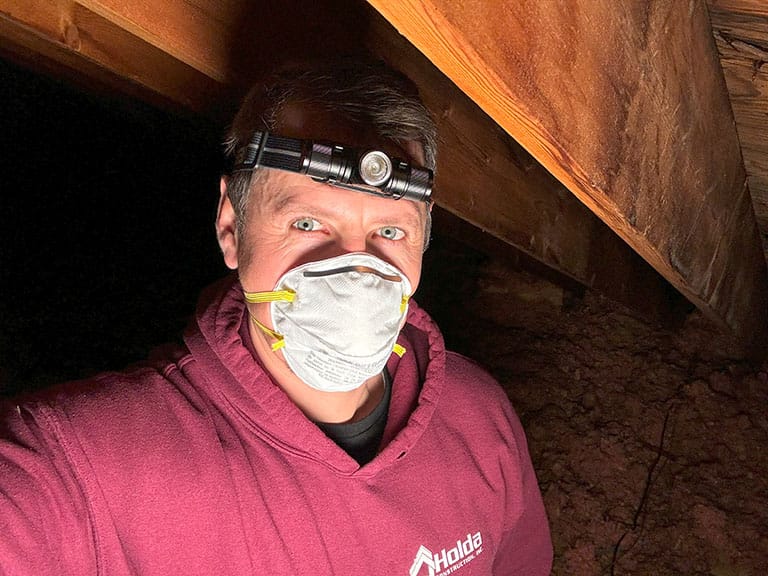
Some of the inspections in this guide involve entering the attic or observing mechanical systems. Safety must take priority:

  1. When in an attic, follow what we like to call “The Floor is Lava” rule. Step only on solid framing members (joists). Insulation does not support weight and is typically laid over drywall ceilings. Stepping between joists can (and very likely will) result in falling through the ceiling.
  2. Wear respiratory protection. Attics commonly contain fiberglass particles, dust, rodent droppings, and, in some cases, mold spores. An N95 or equivalent mask is strongly recommended.
  3. If at any time you smell exhaust fumes, experience dizziness, nausea, or a sudden headache near a furnace, water heater, or chimney, leave the area immediately. These can be symptoms of carbon monoxide exposure, which is extremely dangerous.
Interior Roof Inspector
An N95 or equivalent mask is strongly recommended.

Zone 1: Exterior Diagnostics

As we get started, all of the following observations can be made from the ground:

1. The “Brown Icicle Test” (Wood Rot Indicator)

This test is simple. After a freezing night, observe the icicles hanging from gutters or roof overhangs.
  • Normal condition: Icicles are clear and transparent, indicating simple snowmelt.
  • Problem condition: Icicles appear brown, yellow, or tea-colored.
Discolored icicles are often caused by tannins leaching from wet or decaying wood. This suggests that water is moving through structural components rather than shedding cleanly off the roof. When this condition is present, wood rot is active, not historical, and structural deterioration will continue unless the moisture source is corrected.
When icicles appear brown or yellow, this isn’t caused by dirt from the gutter. The color is tannins (sap) being washed out of the rotting wood. Water has traveled through the structure, leaching the life out of the lumber, and this is clear indication of active rot. If ignored, the roof structure will fail within a few seasons.

Normal Scenario

Brown Icicle Test Normal Scenario
Icicles are crystal clear and transparent. This is just melting snow.

Problem Scenario

Brown Icicle Test Problem Scenario
Icicles are brown, tea-colored, or dirty.

2. Snow Melt Pattern Check (Heat Loss and Ice Dams)

A second simple check during winter weather: after a snowfall, compare your roof to neighboring homes or unheated structures such as garages.
Snow Melt Pattern Check
What do you see?
  • Positive condition: Snow remains evenly distributed across the roof surface.
  • Problem condition: Snow melts in the upper or middle sections of the roof while remaining at the eaves.
Uneven snow melt indicates heat escaping from the living space below. As melted snow refreezes at colder roof edges, ice dams form. These dams trap water, forcing it beneath shingles and into wall and ceiling assemblies. This is a common cause of mold, damaged drywall, and premature roof failure.

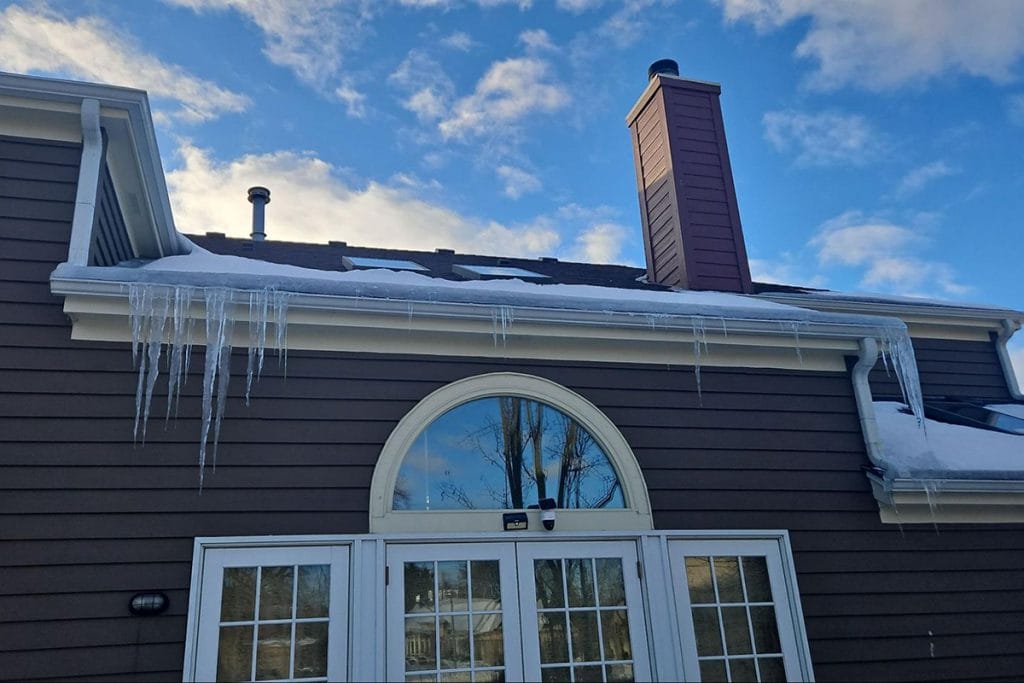
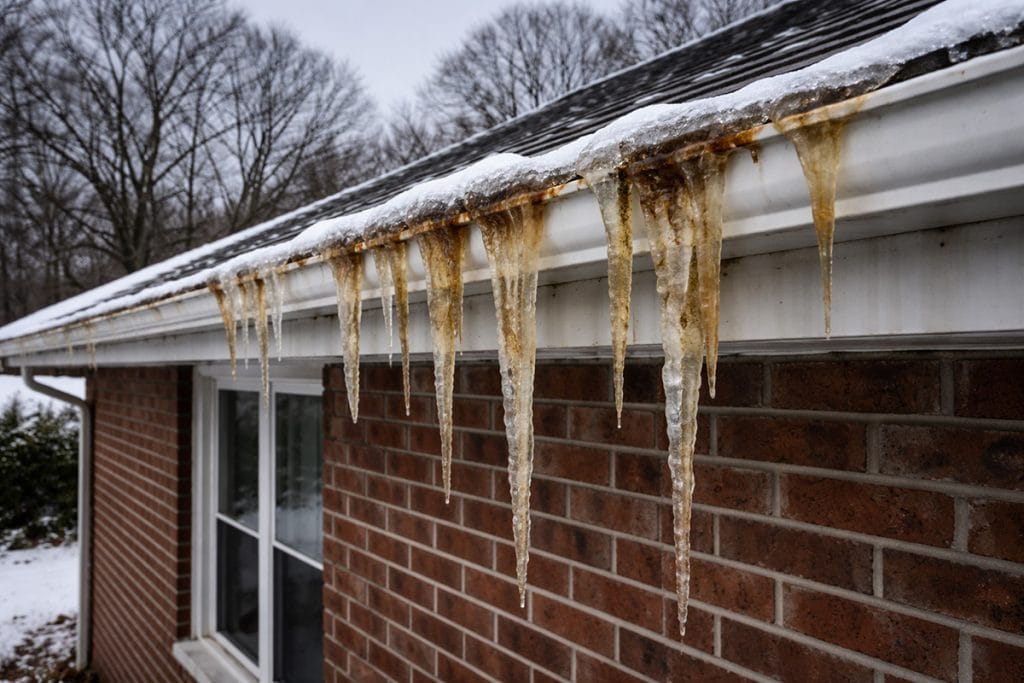
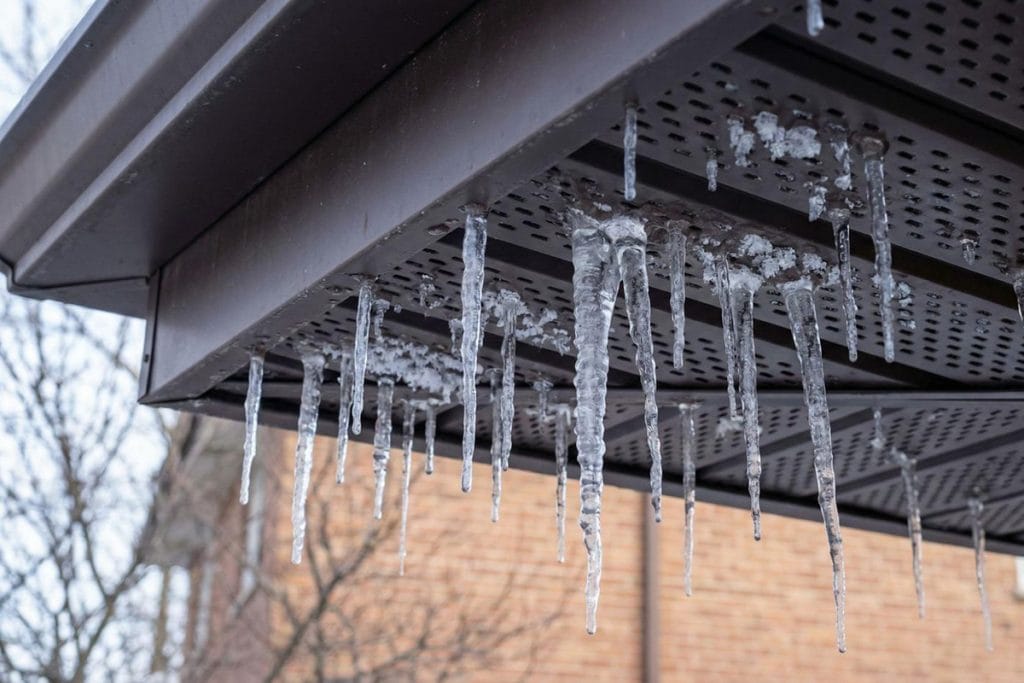
To learn more about why ice dams form on roofs, visit our helpful blog article!

3. Soffit Vent Icicle Check (Ventilation Failure)

This one just requires one action: Look up! Inspect your soffit vents located beneath the roof overhangs.

Ice formation at intake vents indicates that warm, moisture-laden air is escaping the house and freezing at the vent opening. This means insulation and air sealing have failed, and the ventilation system is no longer functioning as designed. Moisture accumulation inside wall and roof assemblies is likely, and can lead to hazardous conditions like mold and wood rot..

Normal Condition

Soffit Vent Icicle Check Normal Condition
Vents are dry and unobstructed.

Problem Condition

Soffit Vent Icicle Check Problem Condition
Ice or icicles forming at or protruding from vent openings.

Zone 2: Attic Inspections (Use caution; follow safety guidance above)

While most people really don’t think about it day to day, your attic spaces give you a direct perspective on what is going on with the health of your roof, as the underside of your roof deck makes up your attic ceiling. It is important to look in the attic on a semi-regular basis to check for leaks,condensation and / or other signs of issues or wear.
The following steps explain exactly what to look for while in the attic space:

4. Insulation Surface Check (Air Leakage Detection)

While wearing a mask to protect from fiberglass, shine a flashlight across the top surface of attic insulation.

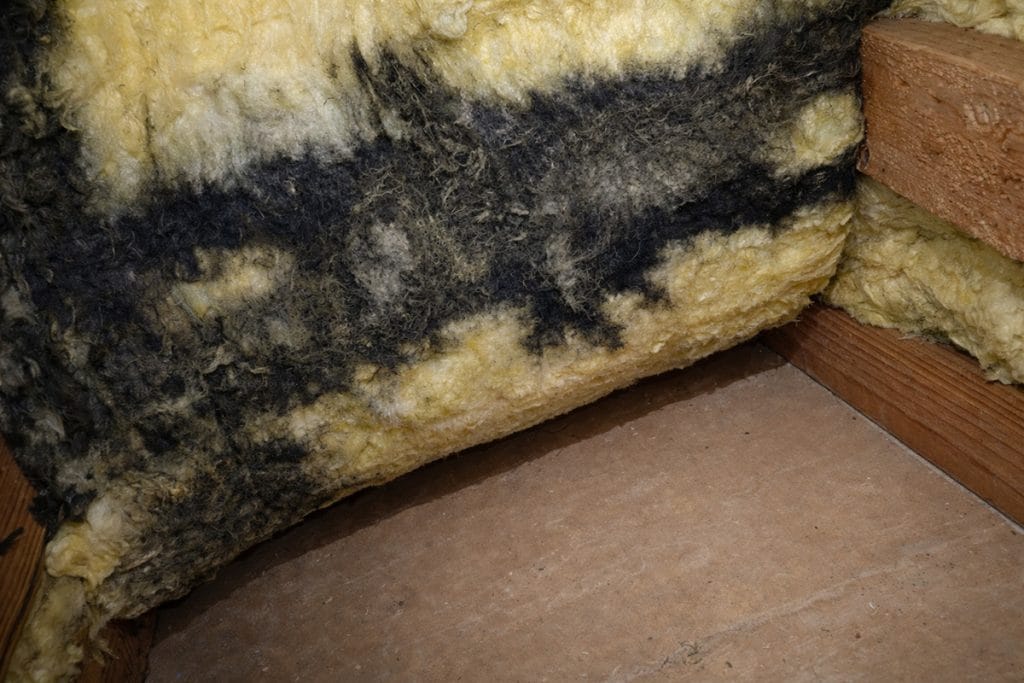
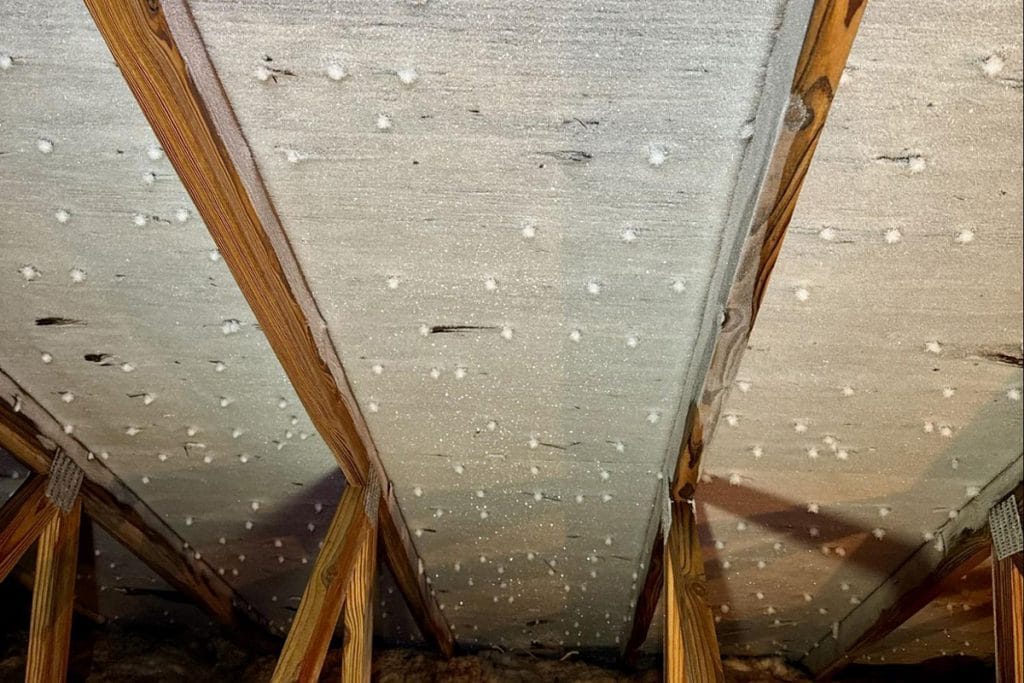
Fiberglass insulation acts as an air filter. Discoloration indicates air movement from the living space below, carrying dust and debris through ceiling leaks. Each stained area represents a point of heat loss and moisture transfer that should be sealed.

Positive Condition

Insulation Surface Check Normal Condition
Insulation appears uniformly clean and fluffy.

Problem Condition

Insulation Surface Check Problem Condition
Dark, dusty, or gray patches are visible.

5. Nail Frost Check (Condensation Risk)

On very cold days, carefully inspect nail tips protruding through the roof deck. Use caution here, as well, as it’s easy to bump up against attic nails as you lose track of the sharp edges:
Frost accumulation in the attic occurs when warm, humid indoor air enters and condenses on cold surfaces. When temperatures rise, this frost melts and wets the insulation below, significantly reducing its effectiveness and increasing the risk of mold and wood decay.

Normal Condition

Nail Frost Check Normal Condition
Nails are cold but dry.

Problem Condition

Nail Frost Check Problem Condition
Frost has clearly accumulated

6. The “Submarine Light Test” – Is Your Hull Breached?

This test will take two people to perform. How the test is done is slightly different depending on whether it’s day or nighttime hours.
  • At night: Leave a light on in the attic and look for light leaks from below.
  • During the day: With attic lights off, check whether daylight is visible at the eaves.

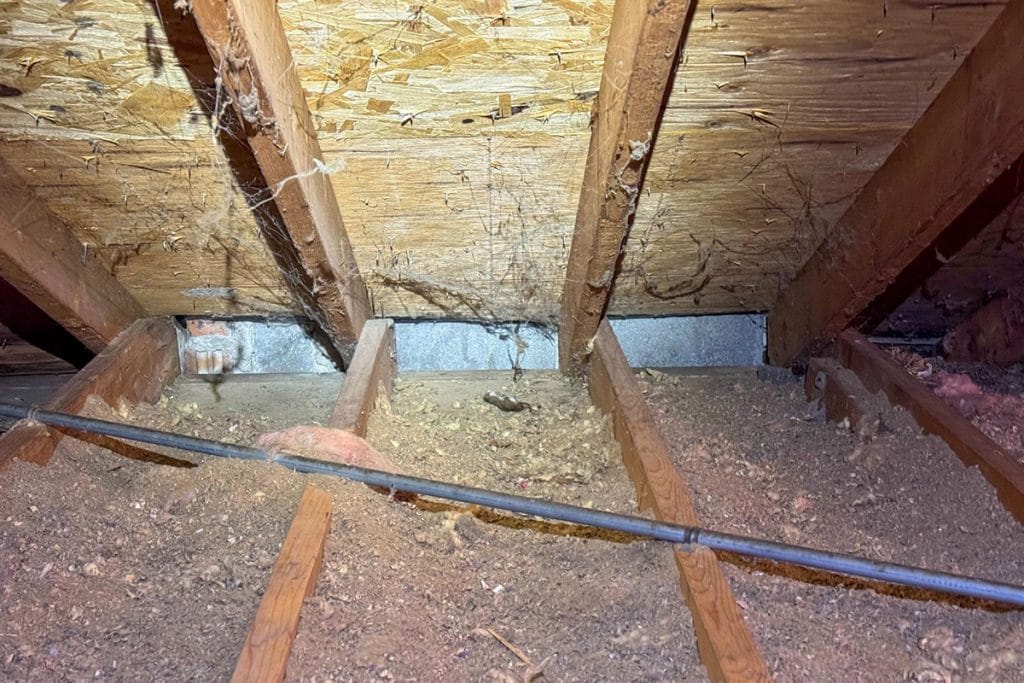
Light visible through ceilings, fixtures, or penetrations indicates air leakage. Conversely, a lack of daylight at the eaves suggests blocked intake ventilation. Both conditions compromise energy efficiency and roof durability.

7. Insulation Depth Measurement

Insert a ruler vertically through the insulation until it contacts the ceiling drywall.

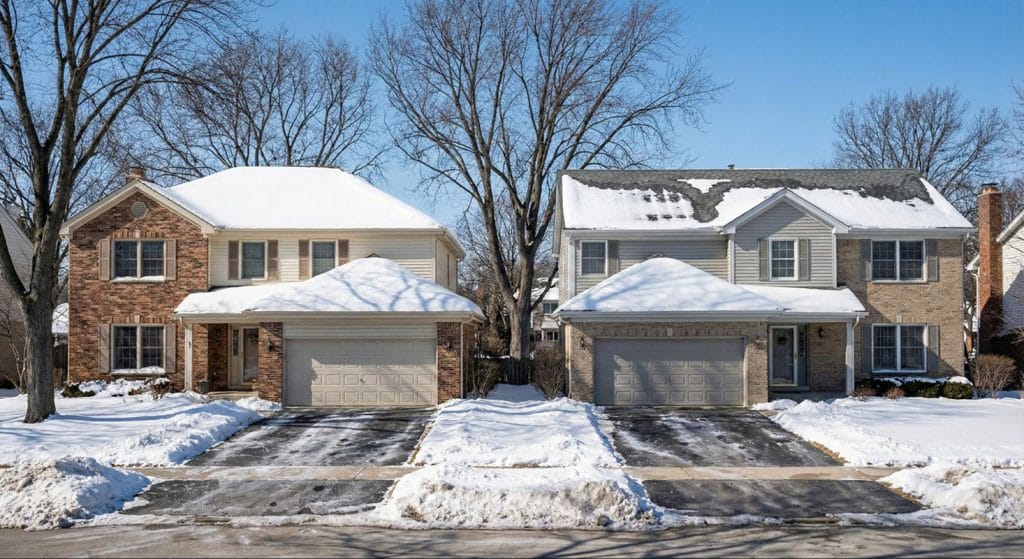
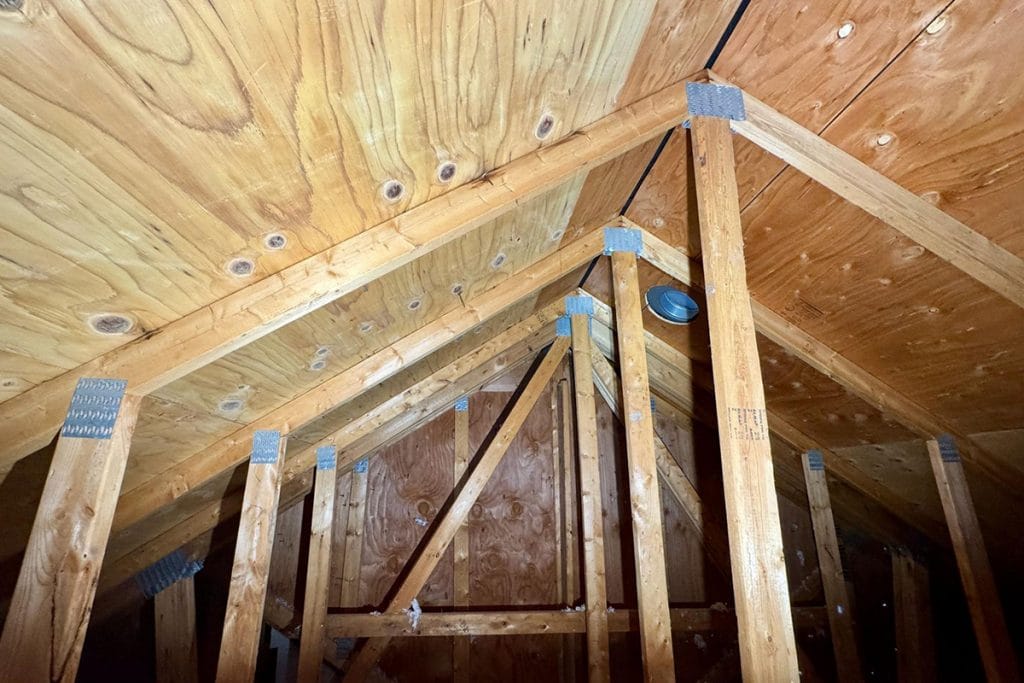
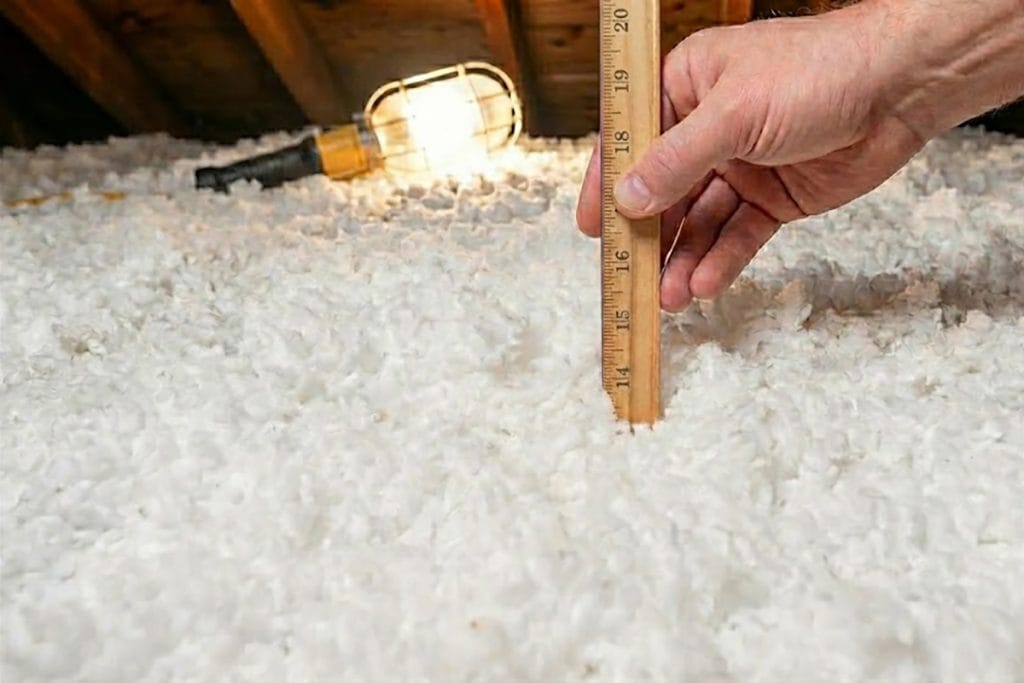
Wood is a terrible insulator, and exposed framing creates thermal bridges that allow heat to bypass the insulation. This heat loss increases energy costs and contributes to uneven roof temperatures that promote ice dams.

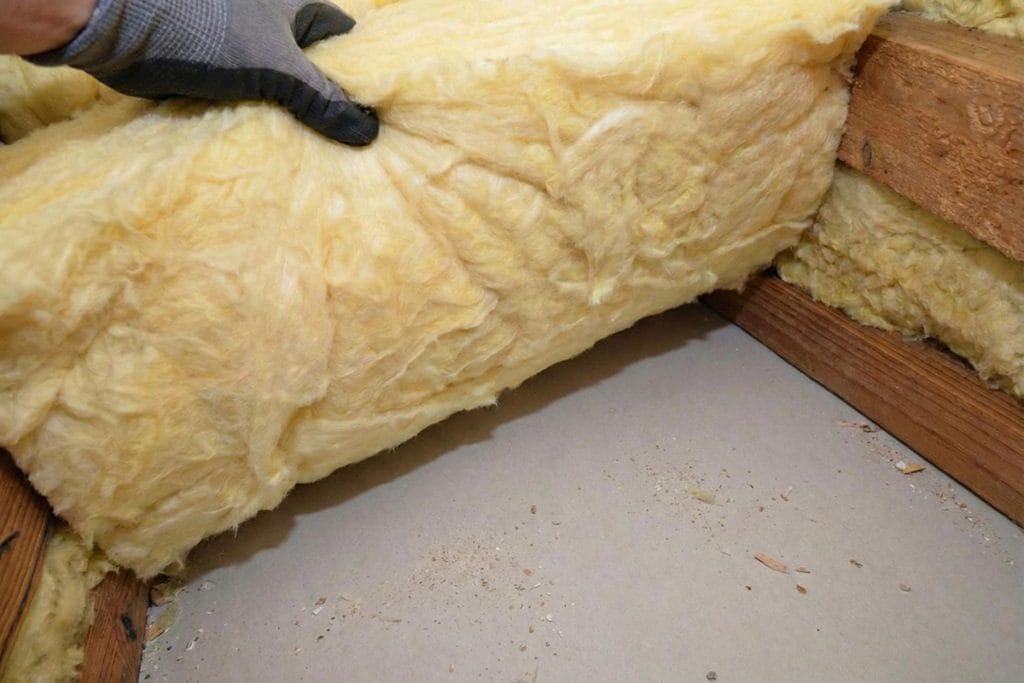
Looking to learn more about insulation types and r-values? Feel free to visit our helpful blog article.

Adequate Insulation

Adequate Insulation Depth
Approximately 16 inches or more, fully covering joists.

Inadequate Insulation

Inadequate Insulation Depth
Joists remain visible or partially exposed.

Zone 3: Critical System Checks (Life safety considerations)

This section focuses on life-safety–related components that directly impact occupant health, fire risk, and long-term structural integrity. These inspections go beyond comfort or efficiency and identify conditions that can lead to moisture damage, mold growth, fire hazards, or dangerous indoor air quality issues. Any deficiencies found in this zone should be treated as high priority and addressed promptly to reduce risk and prevent more serious consequences.

8. Bathroom Exhaust Routing Check

While in the attic, follow bathroom fan ducts to their termination point.
You’d be surprised how often we see it, but one of the most common causes of attic moisture and mold are disconnected or poorly routed bathroom vents. Instead of venting outside, moisture meant to be exiting the home is routed into the attic where it condenses on the wood. And, in a related issue, uninsulated ducts can also create condensation that can drip onto electrical components.

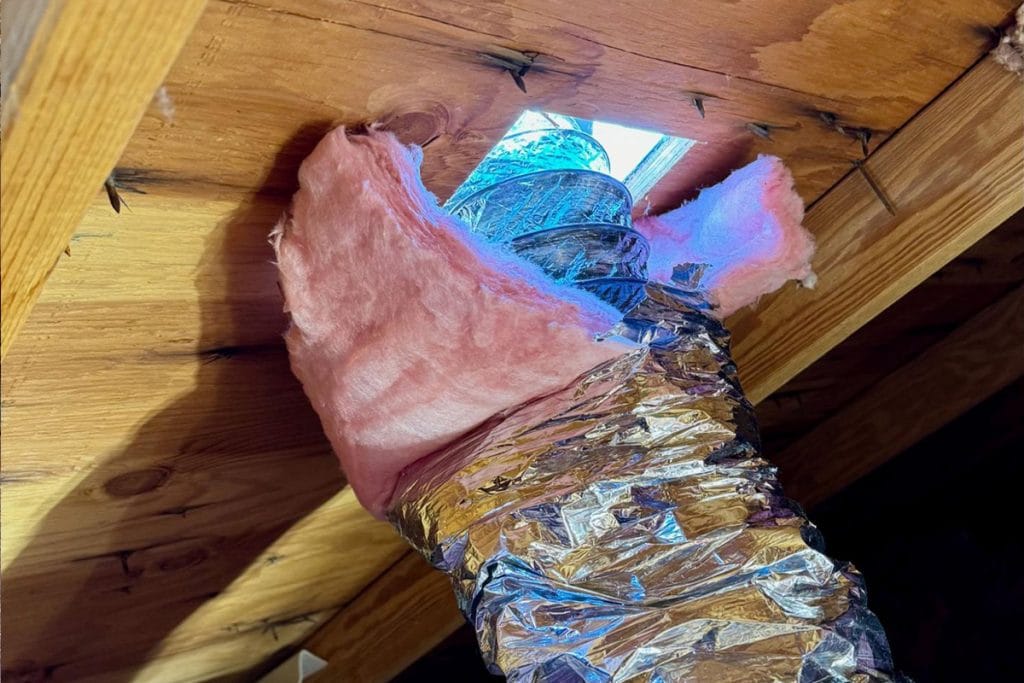
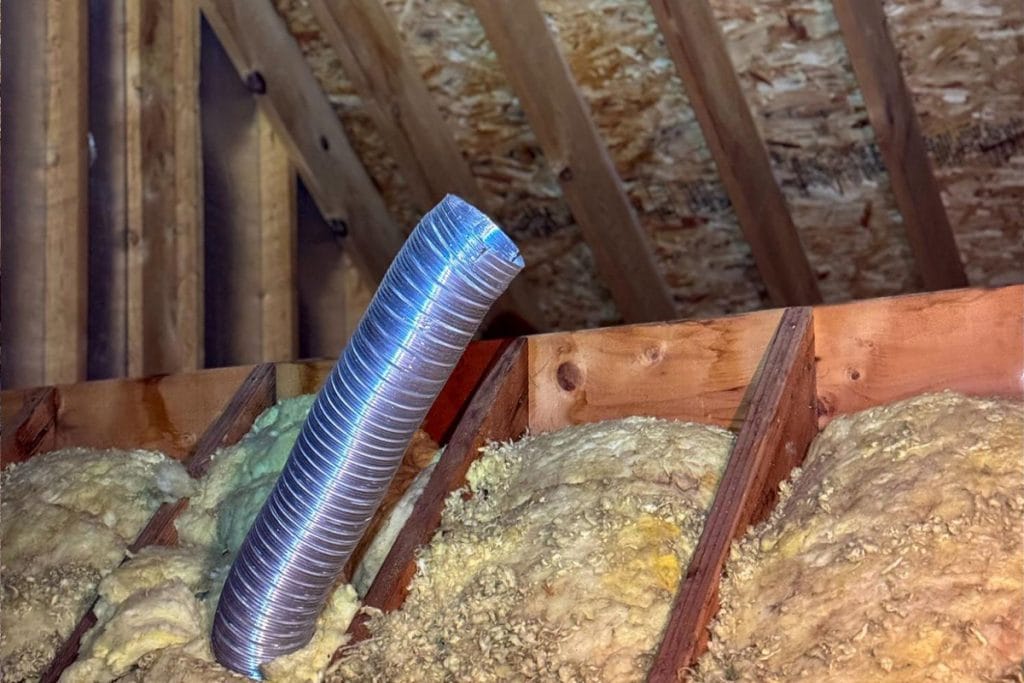
Holda Construction quickly resolved this exact ventilation issue for John, a homeowner in Lake Zurich, IL, when disconnected bathroom vents were discovered during a home inspection. Recognizing the serious risk of moisture buildup and mold growth in the attic, Mariusz responded within an hour of John’s call and completed the on-site repair the same day. The 3-hour project included reconnecting existing bathroom vents and installing an additional roof vent to ensure all moisture was properly exhausted outside. These adjustments can prevent potential structural damage, health risks, and costly future repairs and earned John’s strong recommendation and a five-star Google review for professionalism, clear communication, and effective workmanship.

Correct Installation

Correct Bathroom Exhaust Installation
Insulated ducting vented fully outside the building envelope.

Incorrect Installation

Incorrect Bathroom Exhaust Installation
Ducts terminating in the attic or lacking insulation.

9. The Critical Chimney and Furnace Clearance Check

Inspect the area where chimneys pass through the attic and the top of gas-fired equipment.
  • Safe condition: Required clearance maintained; no insulation contact; clean furnace surfaces.
  • Danger condition: Insulation touching flue pipes, visible soot, or rust staining.

These signs indicate fire risk and possible exhaust backdrafting. Carbon monoxide exposure is a serious concern and requires immediate professional attention.

10. How Burning Incense Can Help Detect a Draft

On a windy day, use an incense stick near outlets, window frames, and trim.
  • Normal condition: Smoke rises vertically.
  • Problem condition: Smoke is drawn sideways or into wall cavities.

Air infiltration affects comfort, indoor air quality, and moisture control. Persistent drafts signal a compromised building envelope.

Zone 4: Ventilation Capacity Calculation

11. The 1:150 Ventilation Rule

Proper attic ventilation requires approximately one square foot of net free ventilation area for every 150 square feet of attic floor space.
For example:
  • 1,600 sq. ft. attic ÷ 150 = ~10.6 sq. ft. total ventilation
  • Split evenly between intake (soffits) and exhaust (ridge or roof vents)
Excess exhaust without sufficient intake can draw conditioned air from the home instead of fresh exterior air, increasing energy loss and moisture problems. Balance is essential.

Final Guidance

Finding any of the problem conditions listed above does not mean your home is failing—but it does mean intervention is likely needed. And if any of this is too much for you, we are more than happy to lend a hand. Learn all about our free vs. paid inspections by visiting our blog.

Moisture, air leakage, and improper ventilation rarely resolve on their own. Left unchecked, they compound until repairs become disruptive and costly. Regular observation and early correction remain the most effective tools a homeowner has to protect their investment.

This checklist is all about awareness, prevention, and informed ownership. If you’d like to learn more about any of these issues, feel free to reach out to us at 847.847.2883 or contact us online. We’d be happy to discuss your specific issues and come up with the best solution to get your home healthy fast.

Contact us today!

Contact us today to discuss your inspection findings — we’ll be happy to help.

Related Posts