What is R-Value? Guide to Home Insulation Types
-
 Mariusz Holda
IL License Number: 104.017181
 Mariusz Holda
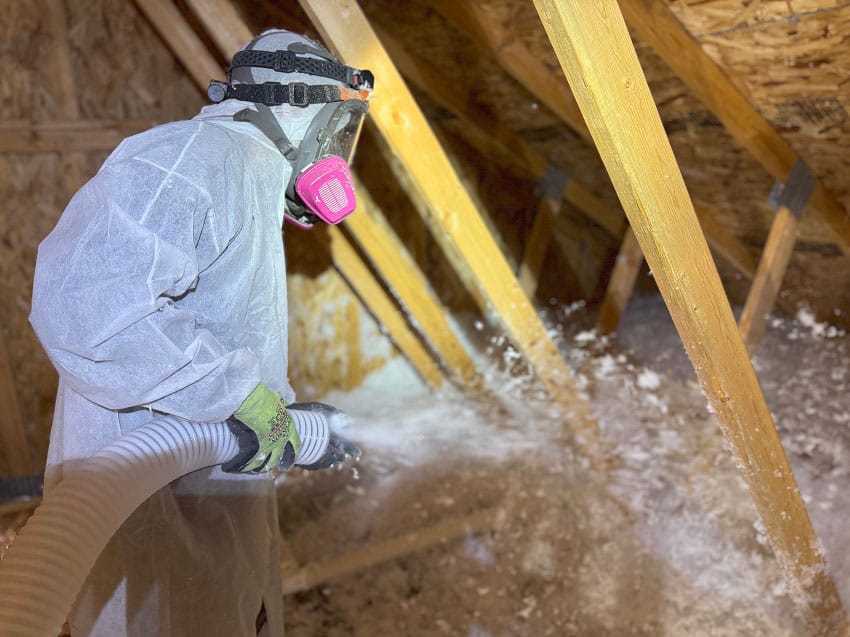
Home » Learning Center » Insulation » What is R-Value? Guide to Home Insulation Types
When it comes to maintaining a comfortable and energy-efficient home in the Northwest suburbs of Chicago, understanding insulation R-values is crucial. The R-value measures an insulation material’s resistance to heat flow, with higher values indicating better insulating properties. Here’s a comprehensive guide to help you navigate the world of insulation and make informed decisions for your home.
The R-value of insulation represents its thermal resistance. In simple terms, the higher the R-value, the better the insulation will prevent heat from escaping in the winter and entering in the summer. This is essential for homes in our geographical area, where seasonal temperature extremes can be significant.
To determine the R-value of your existing insulation, you can use a tape measure. Simply measure the thickness of the insulation by placing the tape measure against the ceiling board. Generally, for materials like fiberglass and cellulose, each inch of insulation equates to an R-value of approximately 3.5.
Enhancing insulation effectiveness can be achieved by layering different types of insulation materials. For instance, if your attic is already equipped with fiberglass insulation batts, you can further boost its R-value by adding blown-in cellulose insulation on top. This combination results in cumulative R-values, leading to superior thermal performance. By incorporating an additional layer of insulation, you can significantly improve your attic’s ability to resist heat flow, thus enhancing overall energy efficiency.
Common and cost-effective, fiberglass insulation comes in batts or blown-in forms with R-values ranging from R-2.9 to R-3.8 per inch. It’s ideal for attics, walls, and floors.
Made from recycled paper, cellulose is an eco-friendly option with R-values around R-3.2 to R-3.8 per inch. It is particularly effective for filling wall cavities and attics.
Offering superior insulation with R-values from R-3.5 to R-6.5 per inch, spray foam also acts as an air barrier, sealing gaps and cracks.
Used for exterior walls, basements, and foundations, rigid foam boards have high R-values, typically around R-4 to R-6 per inch.
Known for its fire resistance, mineral wool provides excellent insulation with R-values similar to fiberglass.
Insulating under your home’s siding is a crucial step in enhancing its overall energy efficiency and comfort. This type of insulation involves adding a layer of insulating material (rigid foam board, spray foam, or mineral wool) directly between the exterior walls of your home and the siding.
When installing insulation under siding, it’s important to ensure that it is done correctly to maximize its benefits. The process typically involves removing the existing siding, installing the insulation material, and then reapplying the siding. This can be done during new construction or as part of a siding replacement project.
Holda Construction does not recommend more than a 1″ thickness for insulation under siding.
Hiring a professional for this type of insulation project ensures that the materials are installed correctly and efficiently, minimizing the risk of future issues. They will also ensure compliance with local building codes and standards.
Insulated siding is an innovative solution that combines the benefits of traditional siding with built-in insulation. This product is designed to enhance your home’s energy efficiency while providing a durable and attractive exterior finish.
Different brands offer various R-Values, typically ranging from R-2 to R-6, providing substantial insulation compared to traditional siding. Our go-to brands are PlyGem / Mastic, James Hardie, and LP Building Solutions/ LP SmartSide. Each option can be explored, and we will work with you to decide which is best based on the unique characteristics of your home.
Insulated siding consists of vinyl or fiber cement panels with a layer of rigid foam insulation attached to the back. This combination provides an integrated solution that enhances thermal performance and improves the aesthetic appeal of your home.
Installing insulated siding involves attaching the insulated panels directly to your home’s exterior walls. This can be done over existing siding or as part of a new construction project. The process is relatively straightforward but requires precision to ensure that the panels are aligned correctly and that the insulation forms a continuous barrier.
While some homeowners may opt for a DIY approach, professional installation is recommended to ensure that the siding is properly installed and that all gaps and seams are sealed correctly. This will maximize the thermal performance and longevity of the siding.
By choosing insulated siding, you can enjoy the dual benefits of improved energy efficiency and a beautiful home exterior, making it a smart investment for any homeowner looking to enhance their property’s performance and appearance.
Looking to learn more about insulated siding? Feel free to follow this link to an additional blog: Is Insulated Siding Worth It?.
When it comes to installing insulation, you have the option to hire a professional or handle the installation of rolls and batts yourself. For attics without insulation, we recommend you use faced insulation with the vapor barrier facing the living space. Cut the batts to fit snugly between ceiling joists. If insulation is already present in the attic, install unfaced batts perpendicular to the joists to increase the R-value. Proper installation is essential to prevent condensation problems.
Blown-in insulation, like fiberglass or cellulose, is typically installed by professionals, but DIY options such as GreenFiber cellulose insulation and rental blowers are available.
When installing insulation, always wear:
We can be hired to manage insulation projects, ensuring optimal energy efficiency and compliance with relevant codes. For instance, following windstorm damage, an attic’s blown-in insulation became wet and compromised, necessitating removal as required by the home insurance company. Our comprehensive approach included:
This case highlights our detailed process and commitment to exceeding standard requirements for better insulation performance. See complete project details.
For homeowners in the Northwest suburbs of Chicago, understanding and optimizing your home’s insulation R-values is a key step towards enhancing energy efficiency and comfort. Whether you are retrofitting an older home or building new, selecting the right insulation with appropriate R-values can make a significant difference in your home’s performance.
For professional advice and installation services, consider reaching out to Holda Construction. Our expertise in the latest insulation technologies ensures that your home remains energy-efficient and comfortable year-round.