How to Inspect Your Roof Spring Through Fall: A Homeowner’s Guide for Chicago’s Northwest Suburbs
-
 Mariusz Holda
IL License Number: 104.017181
 Mariusz Holda
 Home » Learning Center » Inspections » How to Inspect Your Roof Spring Through Fall: A Homeowner’s Guide for Chicago’s Northwest Suburbs
At some point, every homeowner notices something that doesn’t look quite right. Maybe a few shingles are starting to curl, or you’re seeing granules collecting in your gutters after a storm. It’s enough to raise a question, but not always enough to know what it means.
Most people assume the next step is getting up on the roof. We’re here to assure you this is not needed.
A thoughtful inspection from the ground can reveal far more than you might expect. In fact, the majority of visible roof issues can be identified without ever leaving solid footing. What matters is not access, but awareness. Knowing what to look for, how to read the signs, and how our local climate shapes the way damage shows up.
In Chicago’s Northwest suburbs, roofs don’t age gently. They move through cycles of freezing, thawing, saturation, and heat that accelerate wear in ways many homeowners underestimate. Small irregularities are rarely isolated, and when you know how to spot them early, you gain the ability to act before they turn into something more serious.
The National Roofing Contractors Association (NRCA) recommends homeowners conduct visual inspections twice a year: once in spring and once in fall.
Why these specific times? Spring inspections let you assess any damage from the winter, which can include things like ice dams, freeze-thaw cracking, and shingle displacement. Fall inspections prepare your roof for the harsh winter ahead.
But here’s what many homeowners don’t realize: Chicago’s climate is particularly brutal on roofing materials. The combination of continental polar air masses, lake-effect moisture, and severe storms creates conditions that accelerate roof aging by 30-50% compared to more temperate climates.
What that means in practical terms is simple. That “25-year warranty” shingle on your roof will typically deliver only 15-20 years of functional service in this region. The 80% Rule applies here: a roof’s functional lifespan in Chicago is typically about 80% of its warranty period due to climate stress.
You should inspect more often when:
It helps to understand the line between what you can confidently assess from the ground and what requires trained eyes and specialized tools.
A ground-level inspection is more powerful than most homeowners expect. When you know what to look for, you can identify many of the early warning signs that your roof is beginning to wear.
From the ground, you can effectively:
These observations give you a strong, practical understanding of your roof’s visible condition and often provide early warning before issues escalate.
What they cannot reveal are the problems developing beneath the surface.
That’s where a professional inspection becomes essential:
The goal is not to push a professional inspection, but to recognize its role. A careful visual check helps you stay ahead of problems, while a professional assessment gives you certainty when it matters most.
You don’t need much equipment for an effective ground-level inspection. Here’s what matters:
Begin where problems show up first.
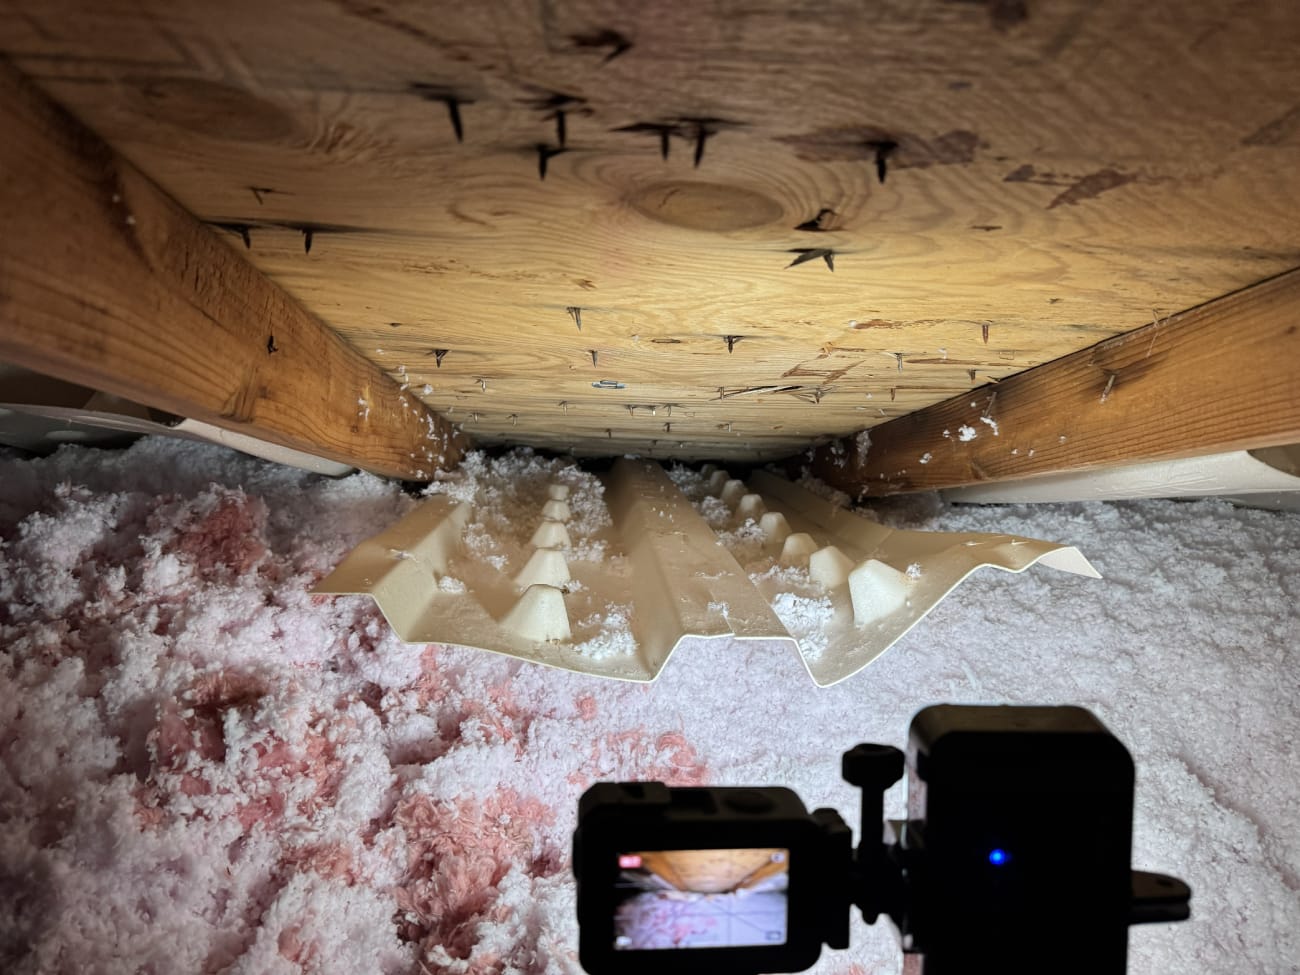
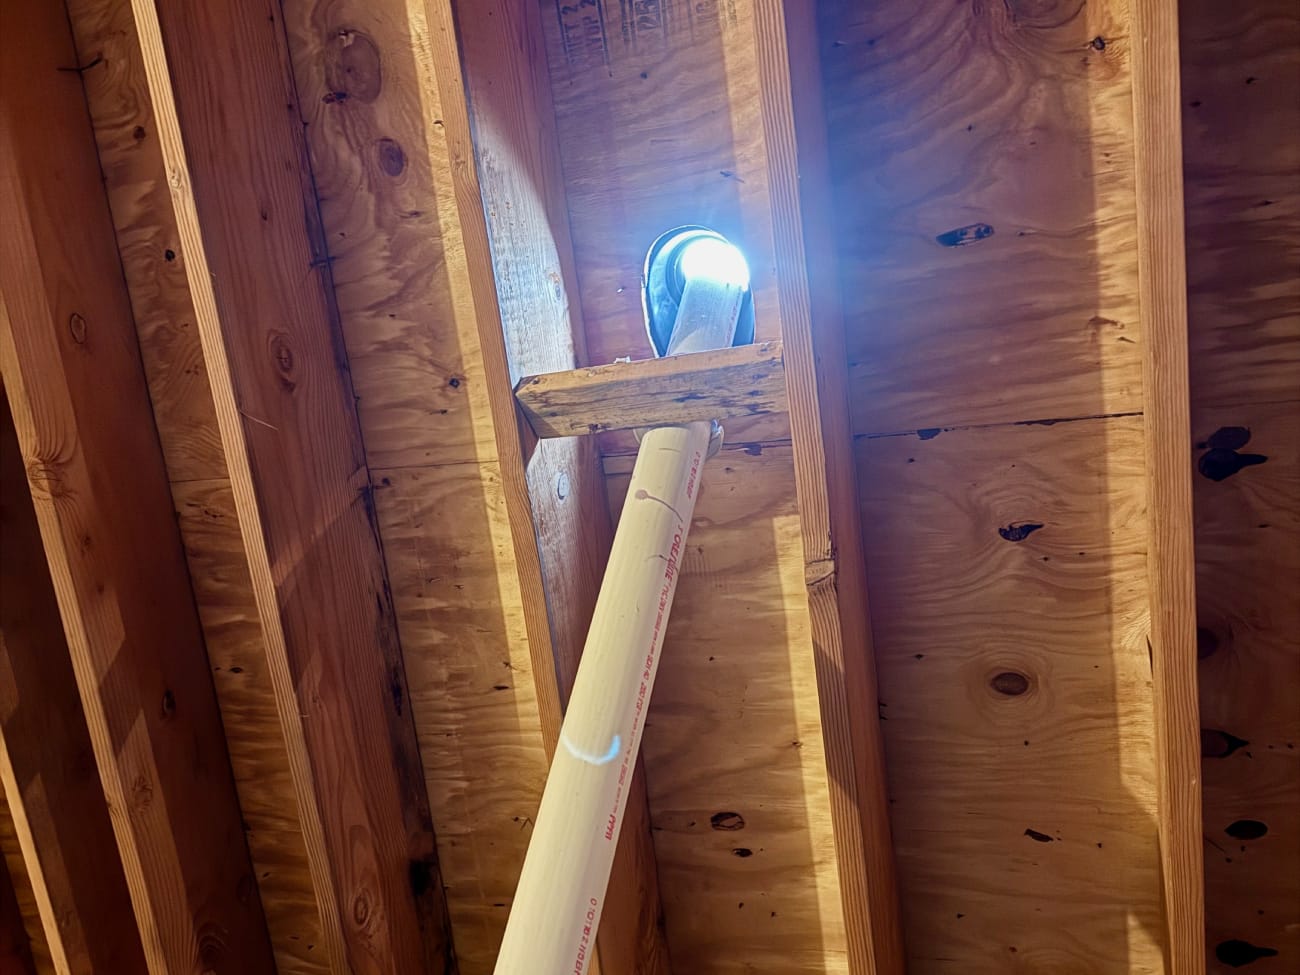
Your attic reveals issues before they reach your ceilings or walls. It’s where early warning signs appear, often long before they’re visible from the outside. Inspect it once during the day to catch light penetration, and again with a flashlight to identify moisture.
What to look for:
There’s a simple principle to keep in mind: if light can get in, so can water. Turning off all lights and looking upward is one of the most effective ways to spot a problem early.
Next, take a slow walk around the exterior of your home.
This is where small clues begin to add up. Look along the base of the house, near downspouts, and around roof edges. What collects on the ground often reflects what’s happening above.
Pay attention to:
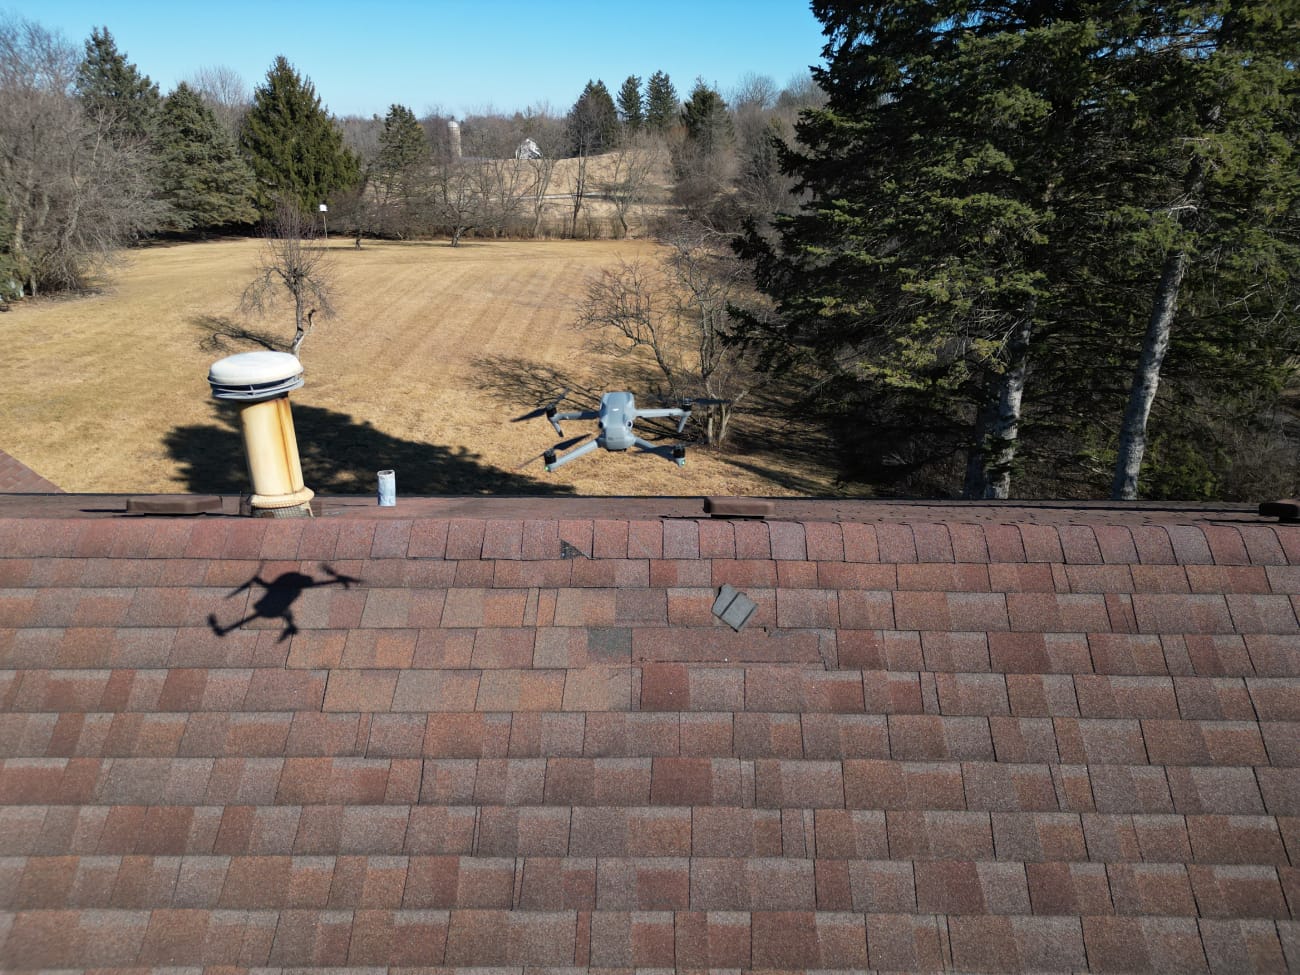
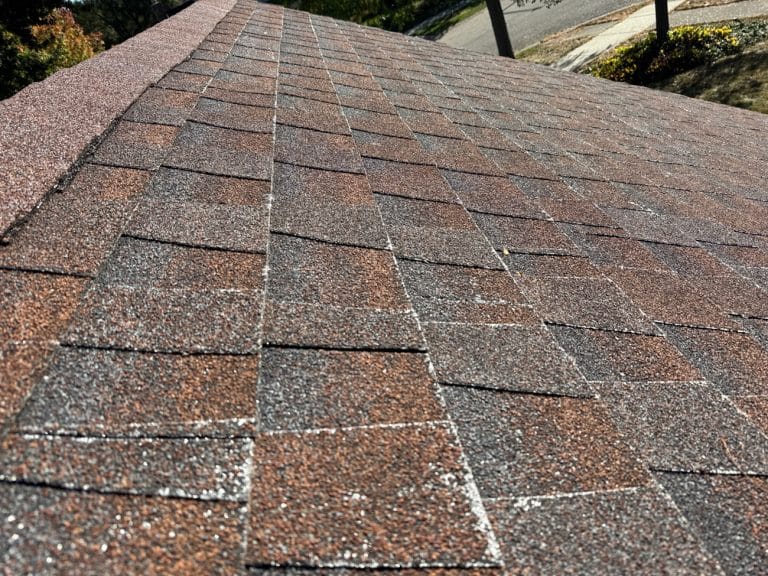
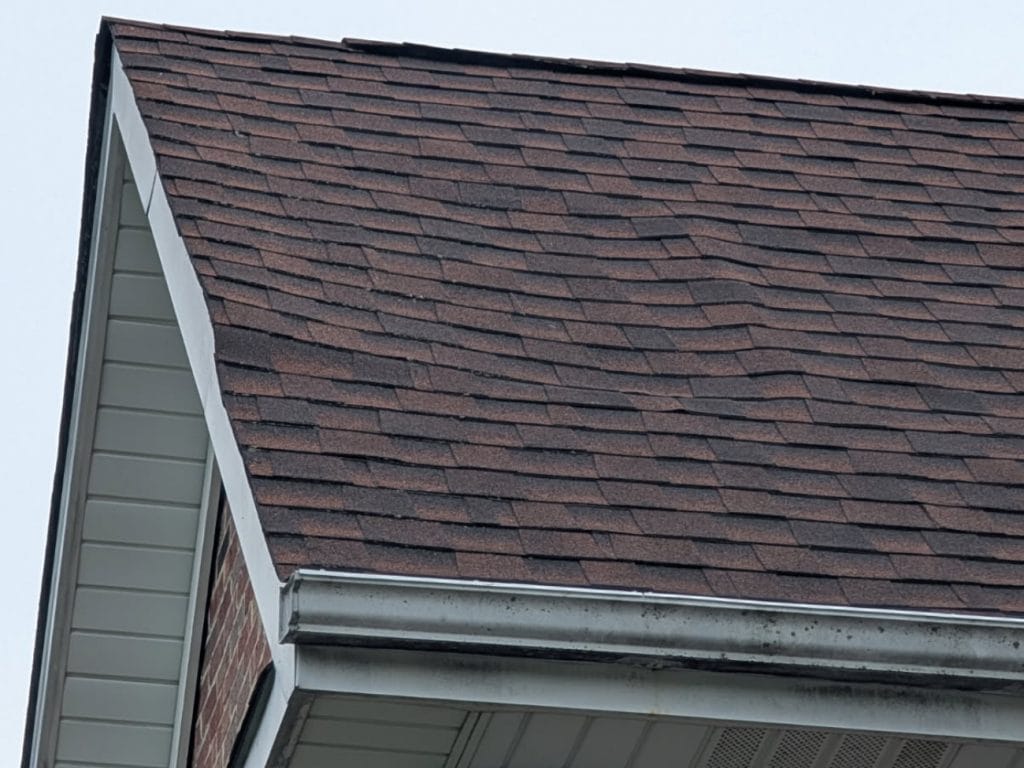
Now step back and study the roof itself.
Using binoculars if you have them, scan each section carefully. The goal is not to rush, but to observe patterns. A consistent surface indicates stability. Irregularities point to areas that need attention.
View each roof plane from at least two angles, ideally with the sun behind you or on a cloudy day to reduce glare.
As you scan, look for:
Move methodically, left to right and bottom to top. A structured approach helps you avoid missing subtle issues.
If you choose to use a ladder, keep the purpose limited. This is about inspecting gutters, not accessing the roof.
Safety matters here, and small mistakes carry real risk.
Follow these basic guidelines:
And most importantly, do not step onto the roof surface from the ladder.
It’s worth being direct about this. Walking on your roof is not necessary, and in many cases, it creates more risk than value.
The danger isn’t only the potential for a fall. It’s also what you can’t see beneath your feet.
Certain conditions make access even more hazardous:
A roof is designed to protect your home, not to be walked on casually. With the right approach from the ground, you can gather the information you need without taking on unnecessary risk.
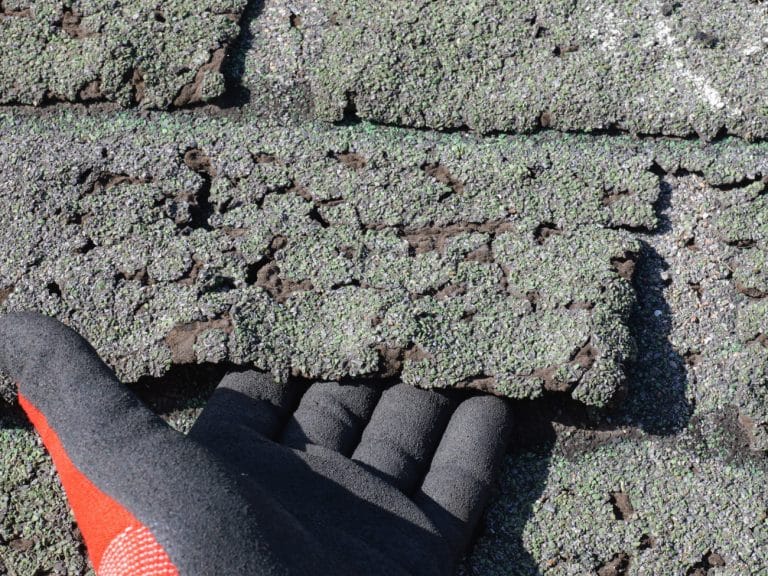
During transitional seasons, roof surface temperatures can swing 60-90°F within a single 24-hour cycle (ambient air swings 30-50°F). Different materials in your shingles (i.e. the fiberglass mat, asphalt binder, and mineral granules) expand and contract at different rates.
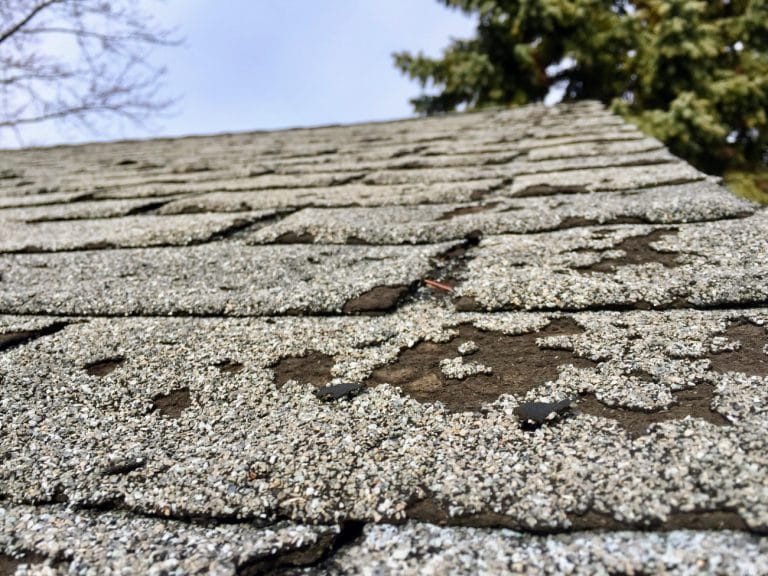
Over thousands of daily cycles, this creates micro-cracks in the asphalt binder. Eventually, you get “thermal splitting”, which are vertical tears in the shingle. Look for vertical cracks, particularly on south and west-facing slopes where temperature extremes are greatest.
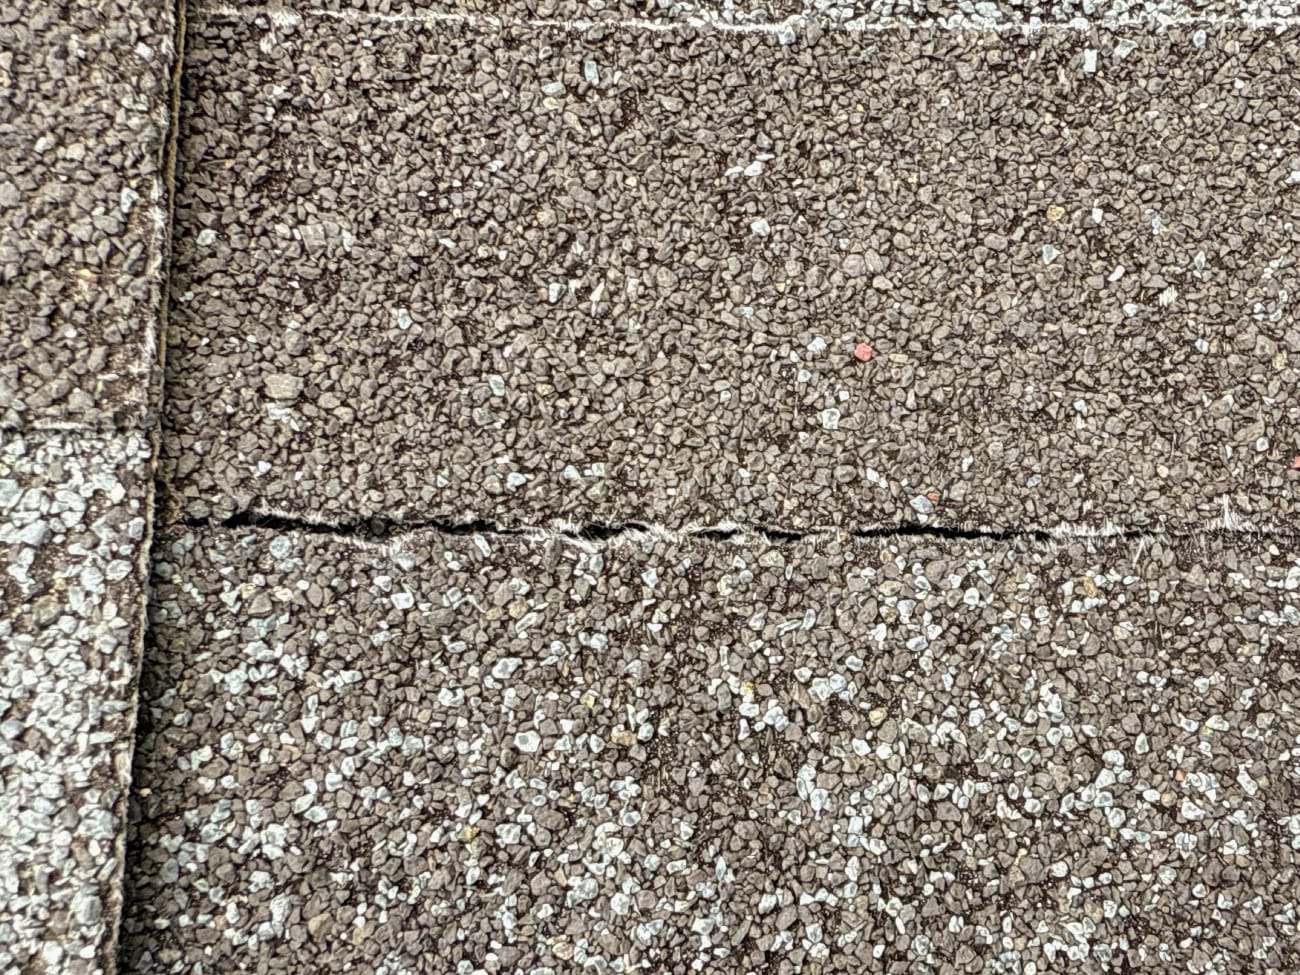
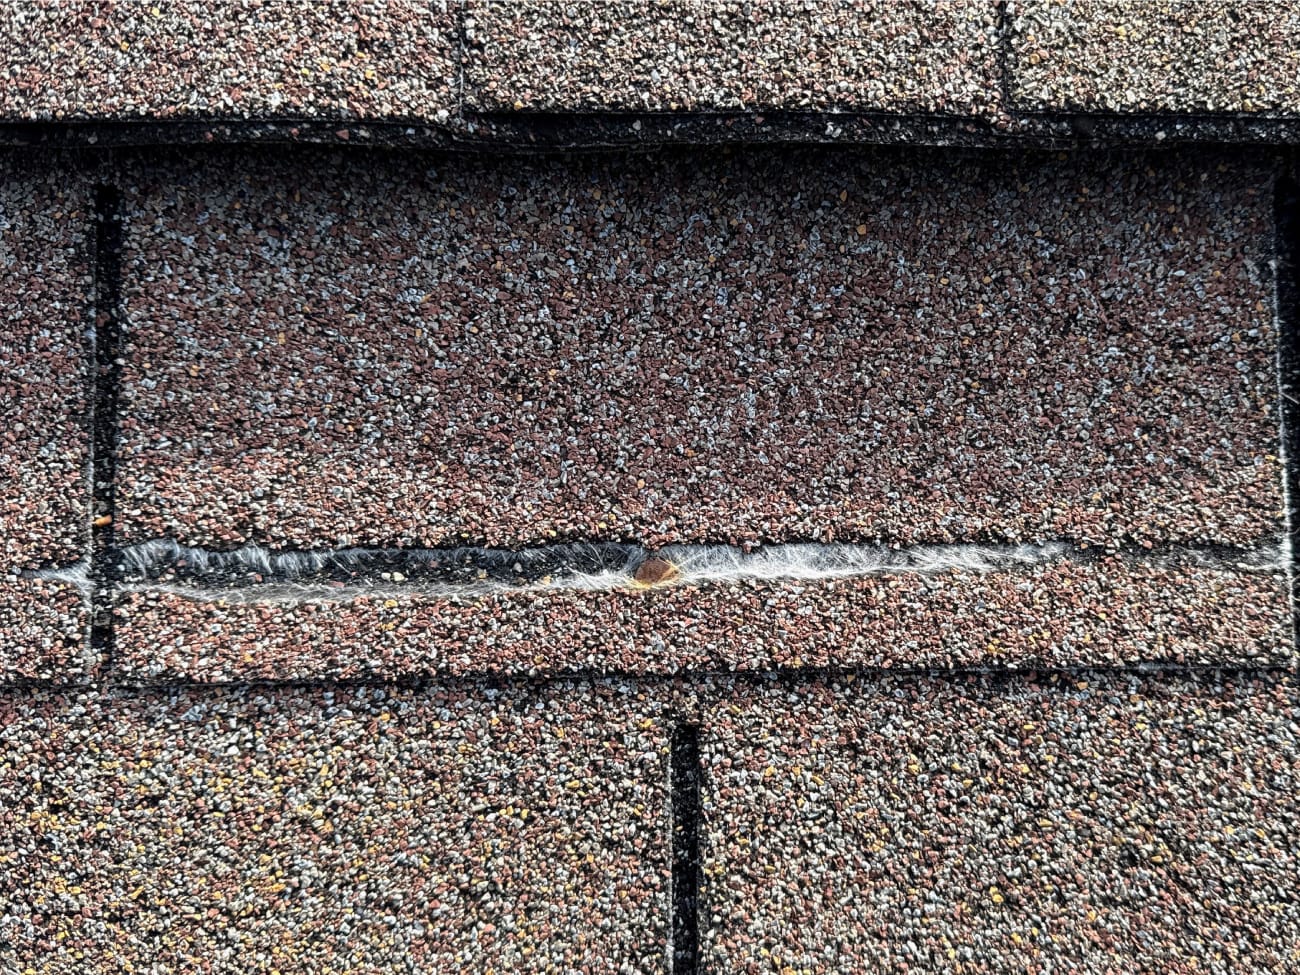
Chicago experiences 40-60 freeze-thaw cycles per year, primarily during late winter and early spring. This is one of the most destructive forces acting on roofing materials.
Here’s how it works: Water infiltrates microscopic cracks. When temperatures drop below 32°F, that water expands approximately 9% as it freezes. This expansion acts like a hydraulic wedge, forcing cracks wider. When ice melts, the expanded cracks don’t fully close, allowing more water in. Each cycle widens cracks further.
Visible signs of freeze-thaw damage:
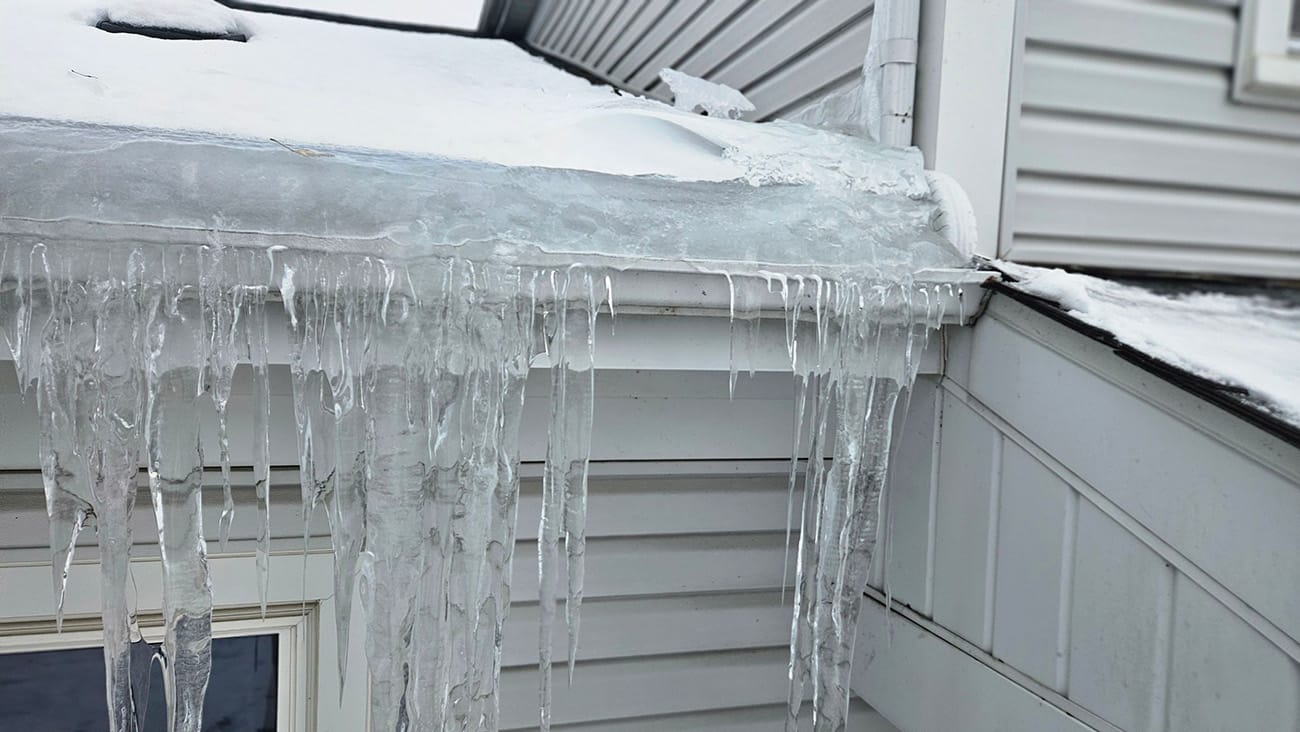
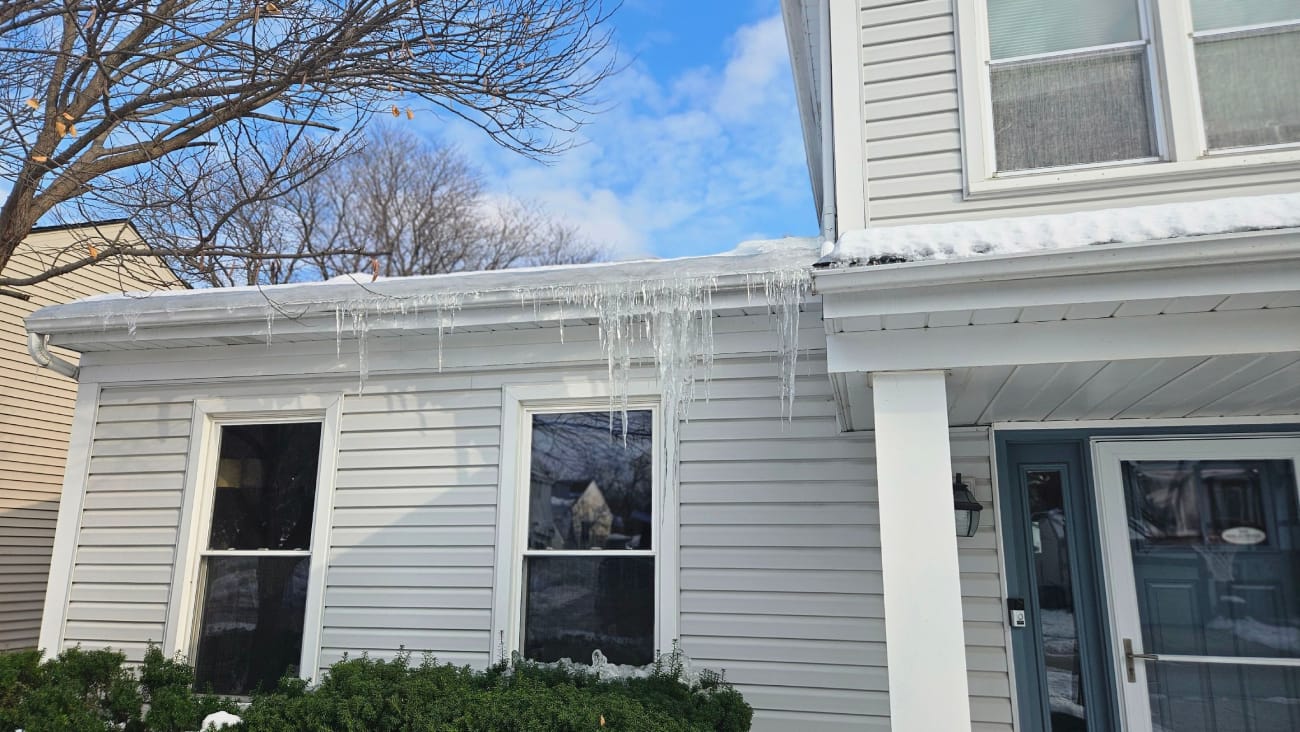
Spring weather is not without its final cold fronts, and ice dams form during snowy or freezing weather when heat escapes from your living space into the attic, warming the upper roof deck. Snow melts from the bottom, runs down to the cold eaves (which extend beyond the heated building), and refreezes into an ice ridge. Additional meltwater backs up behind this dam and seeps under shingles.
Exterior warning signs:
Interior warning signs:
Important to understand: Ice dams indicate a building science problem (inadequate insulation and air sealing), not a roofing defect. The solution requires improving attic insulation, sealing air leaks, and ensuring proper ventilation, not just replacing the roof.
For more tips on things to look for during months of winter weather, visit our 11-Step Winter Inspection Guide.
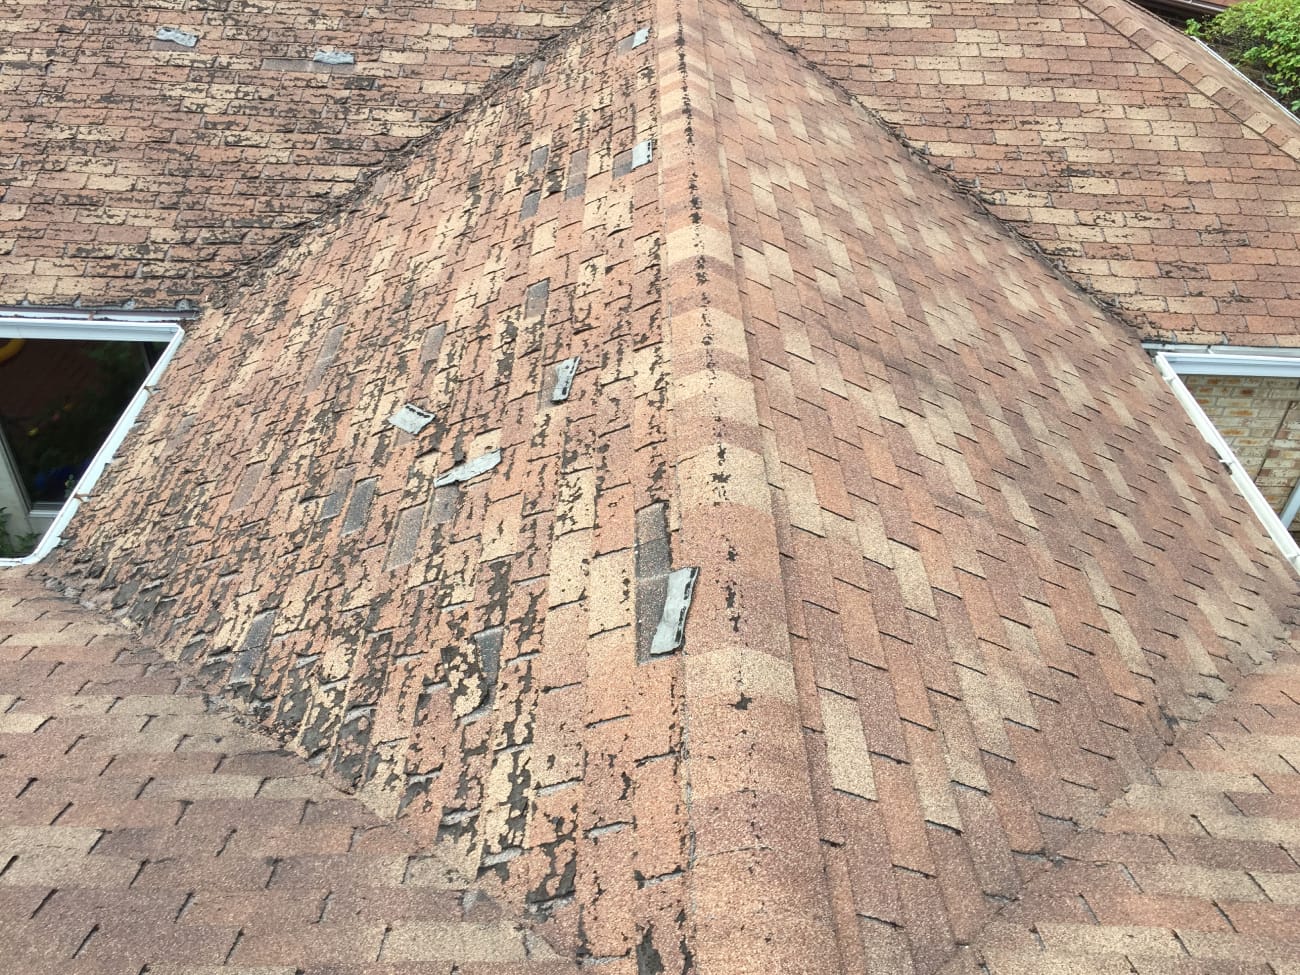
On sunny summer days with air temperatures of 90-95°F, your roof surface reaches 150-170°F. UV radiation breaks down petroleum-based asphalt at the molecular level, dries it out, and weakens the adhesive bonding granules to the surface.
Signs of heat/UV damage:

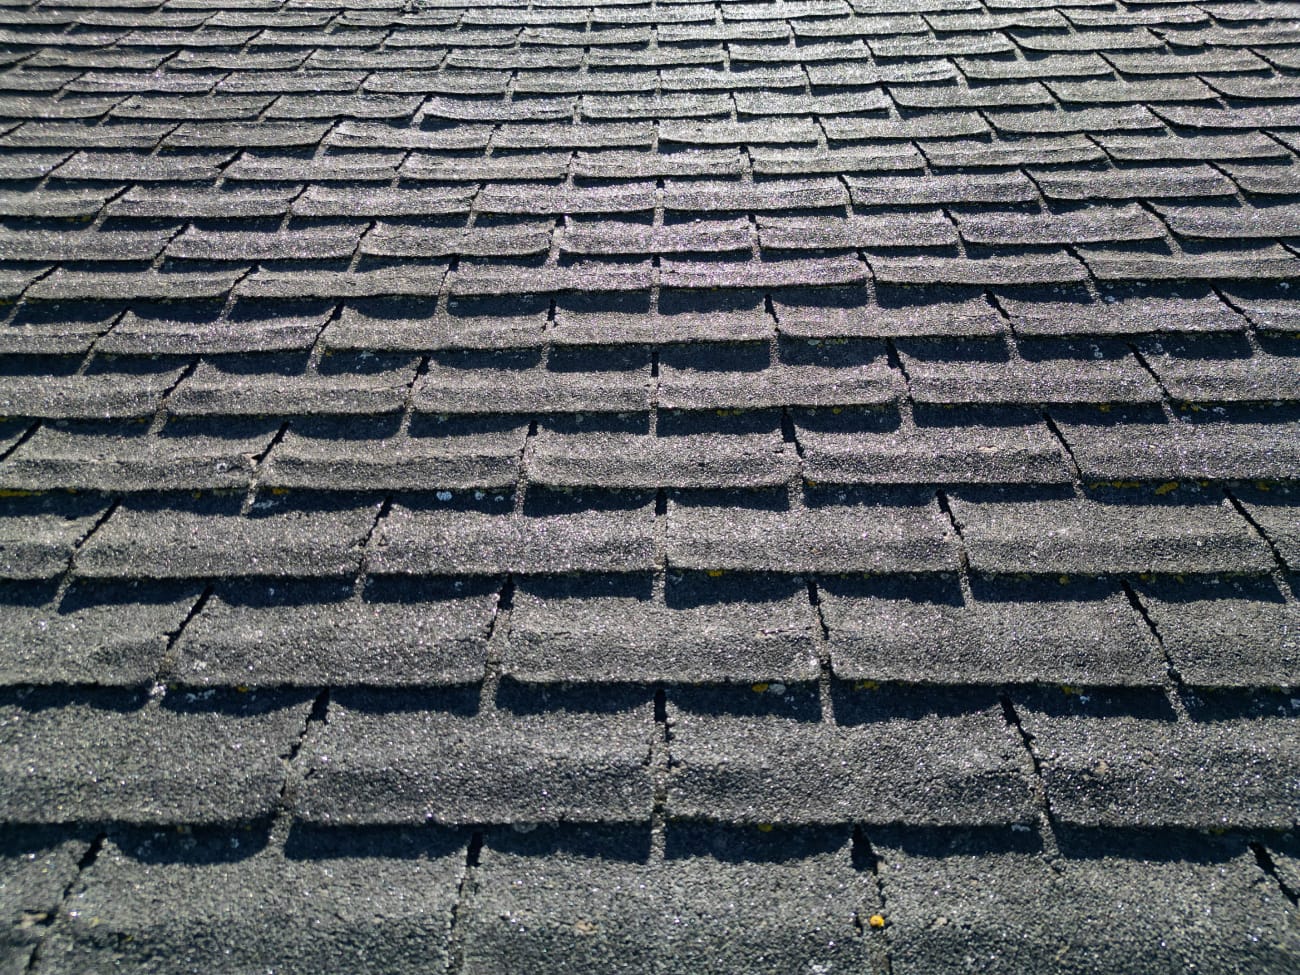
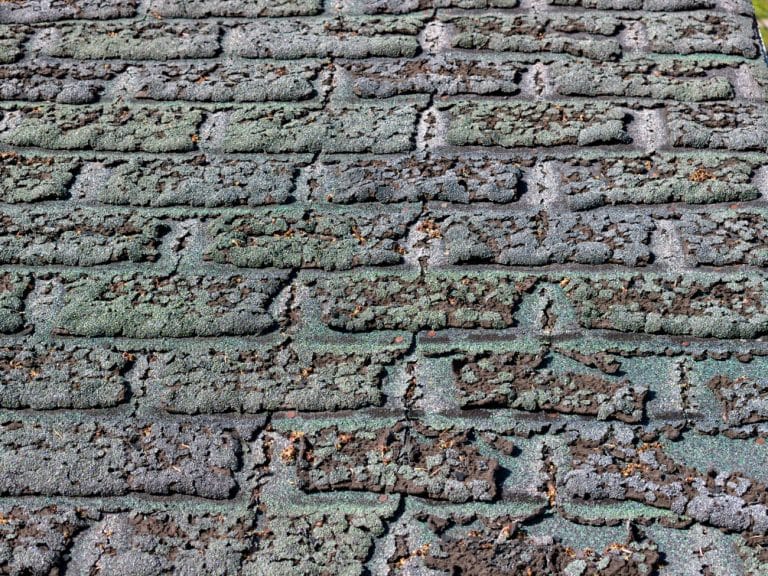
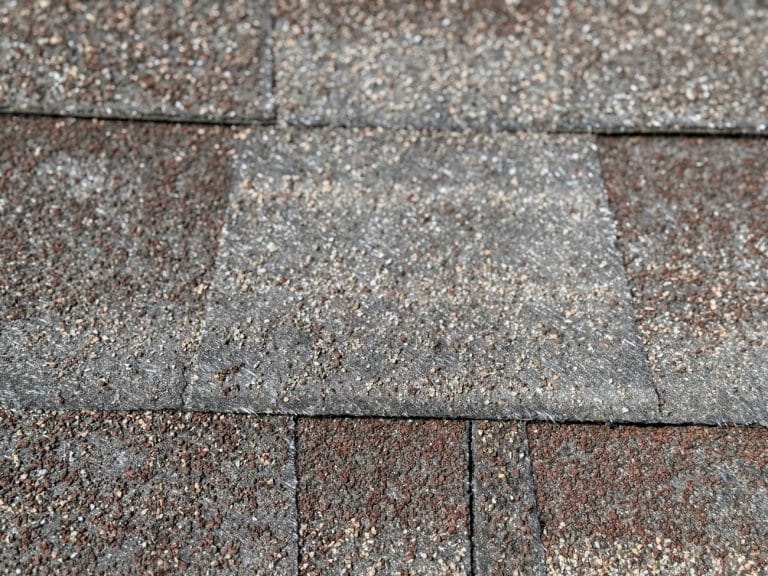
Those sandy particles in your gutters? They’re granules from your shingles, and they matter more than you might think.
Why granule loss matters: Without protective granules, UV exposure accelerates asphalt deterioration by 300-400%. Shingles become brittle and prone to cracking within 1-3 years. Remaining lifespan drops to 5-7 years even on roofs originally rated for 25-30 years.
Here’s how to interpret what you find:
Pro tip: During gutter cleaning, collect granules and match the color to your shingles. Photograph the amount with a ruler for scale so you can track progression over time.
Over 70% of roof leaks originate at penetrations and transitions rather than in the main field of shingles. Knowing where to look dramatically improves your inspection effectiveness.
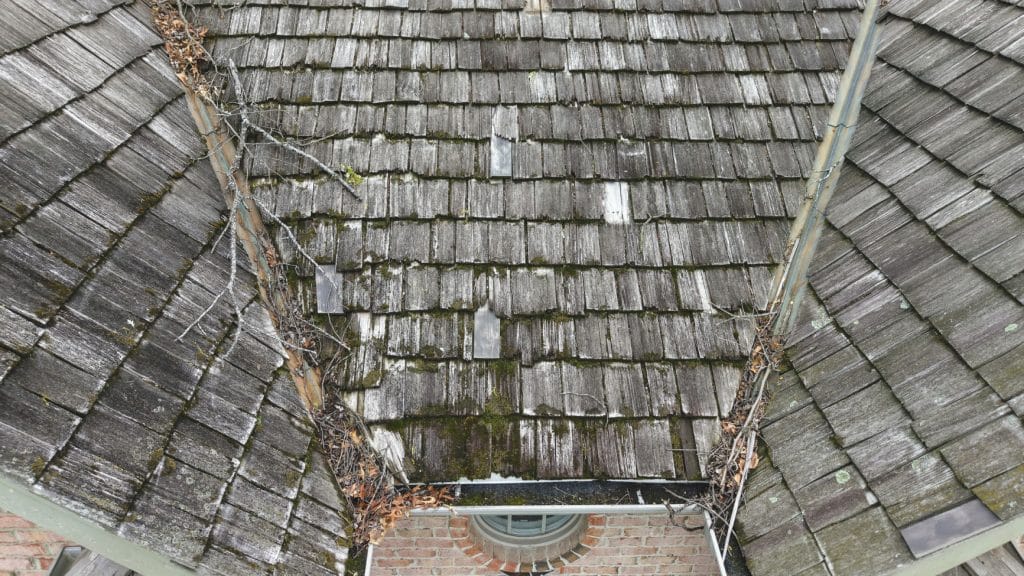
Valleys form where two roof planes intersect, creating V-shaped channels that concentrate water flow, carrying 5-10 times more volume than flat sections during heavy rain. Debris collects here, blocking flow and creating potential failure points.
Look for debris accumulation, rust streaks on metal valley flashing, curling or cracking shingles along valley edges, and any staining suggesting water backup.
Note: Valley leaks often travel horizontally before penetrating living spaces. Interior stains may appear several feet from the actual leak source.
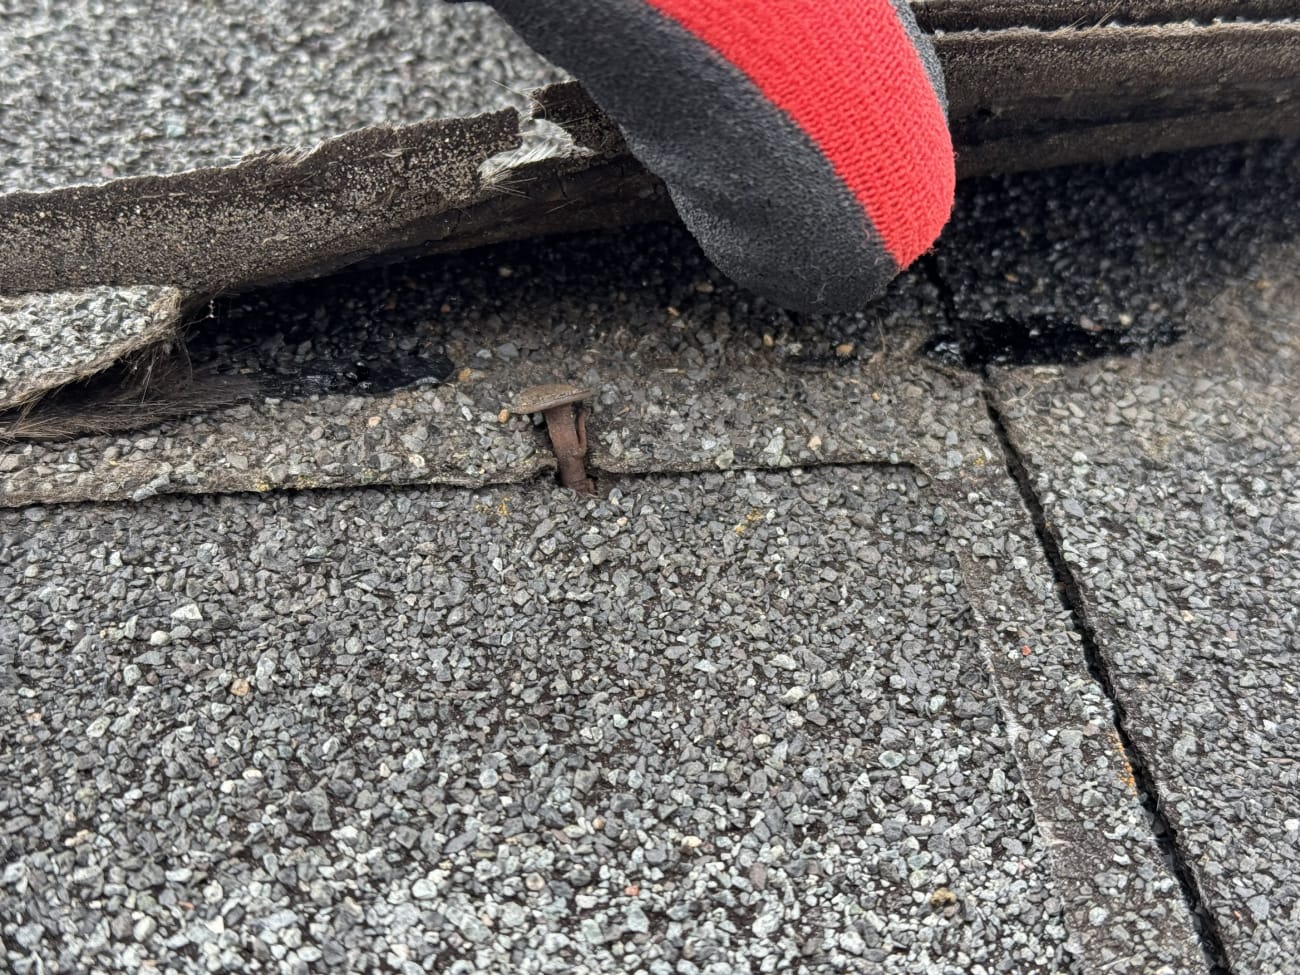
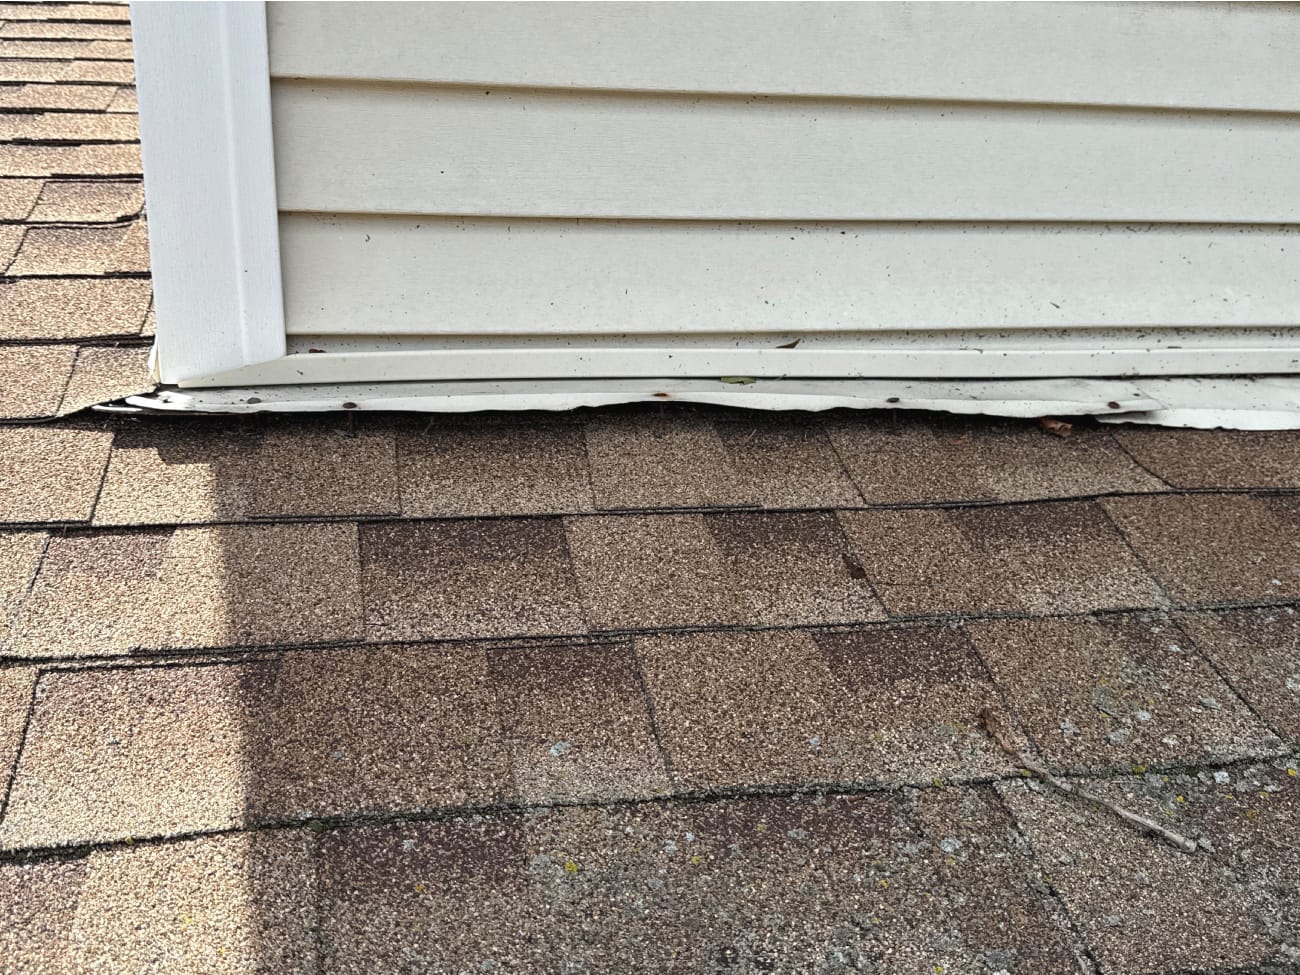
Chimneys require complex flashing systems. From the ground, look for rust or corrosion on flashing, gaps or separation between flashing and the chimney or roof, missing pieces, bent or displaced sections, and cracked or deteriorating sealant.
Also watch for white mineral powder or staining (called efflorescence) on chimney bricks. This indicates moisture problems. Inside, look for water stains near the chimney, musty odors around the fireplace, and rust in the firebox.
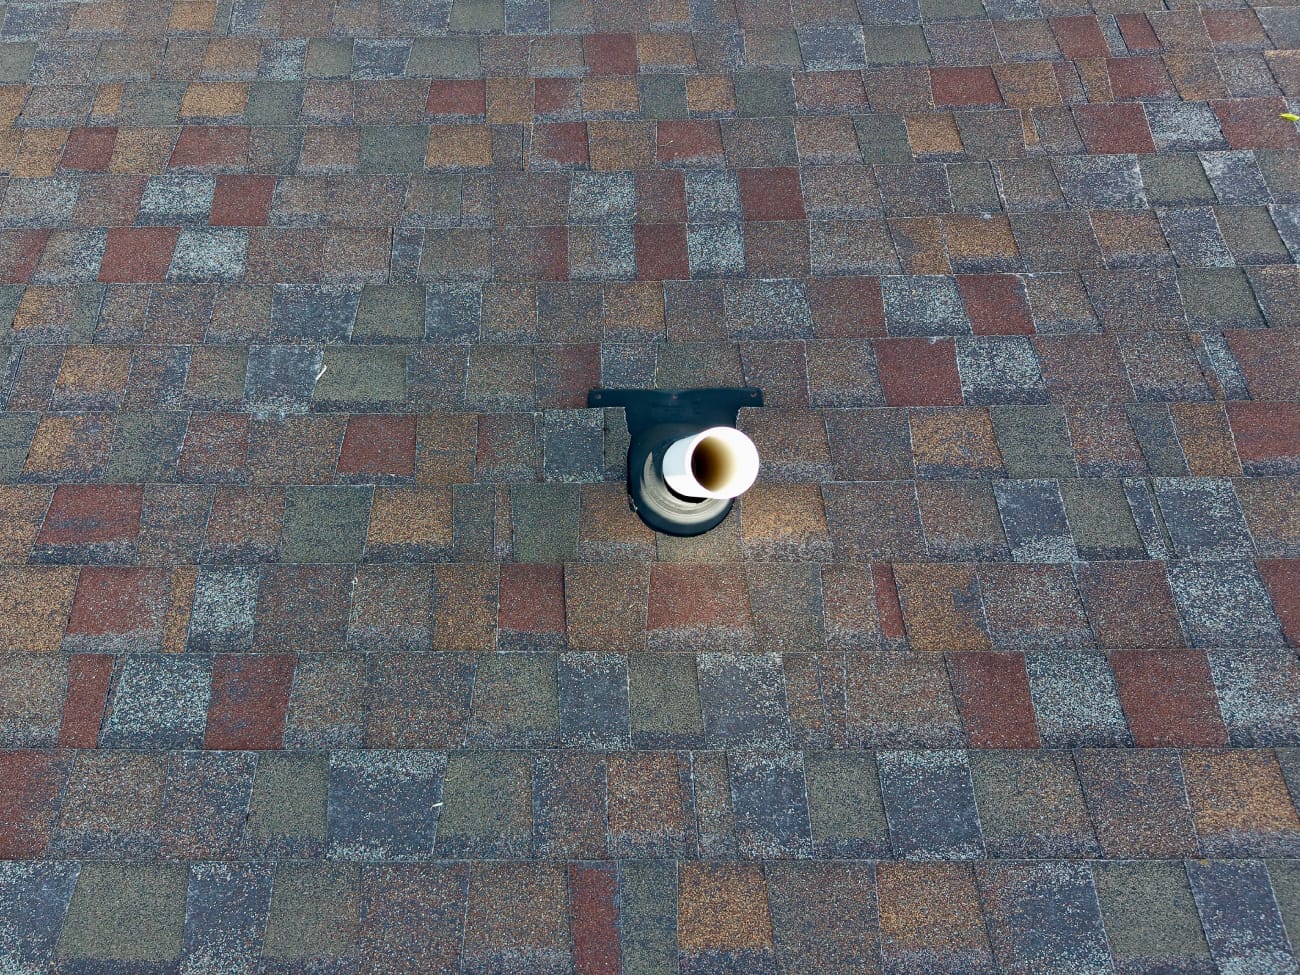
Plumbing vent pipes use rubber or metal “boots” to seal around the pipe. Here’s a critical fact: typical pipe boot lifespan is 10-15 years, which is significantly shorter than shingle lifespan. This means boots often fail before roof replacement is needed.
Warning signs that Boots or Collars Need Replacement:
Proactive replacement costs $75-150 per boot, which is far less than water damage repair. During any roof service call, ask your contractor to inspect and photograph all pipe boots.
Not all attic moisture points to a roof leak, and the key is recognizing how each issue behaves. A roof leak is typically localized and tied to weather—you’ll notice water in a specific spot, often appearing during or right after rain or snow. In contrast, condensation is more widespread and not dependent on precipitation. It often shows up during cold weather, affecting larger areas of the attic, and may include signs like damp roof decking or frost on nail tips.
The pattern is what matters most. If moisture consistently appears in the same place after storms, it’s likely a leak. If it shows up across multiple areas, especially in winter and without any rain, condensation is the more probable cause. Understanding this distinction helps ensure you’re solving the real problem instead of treating symptoms.
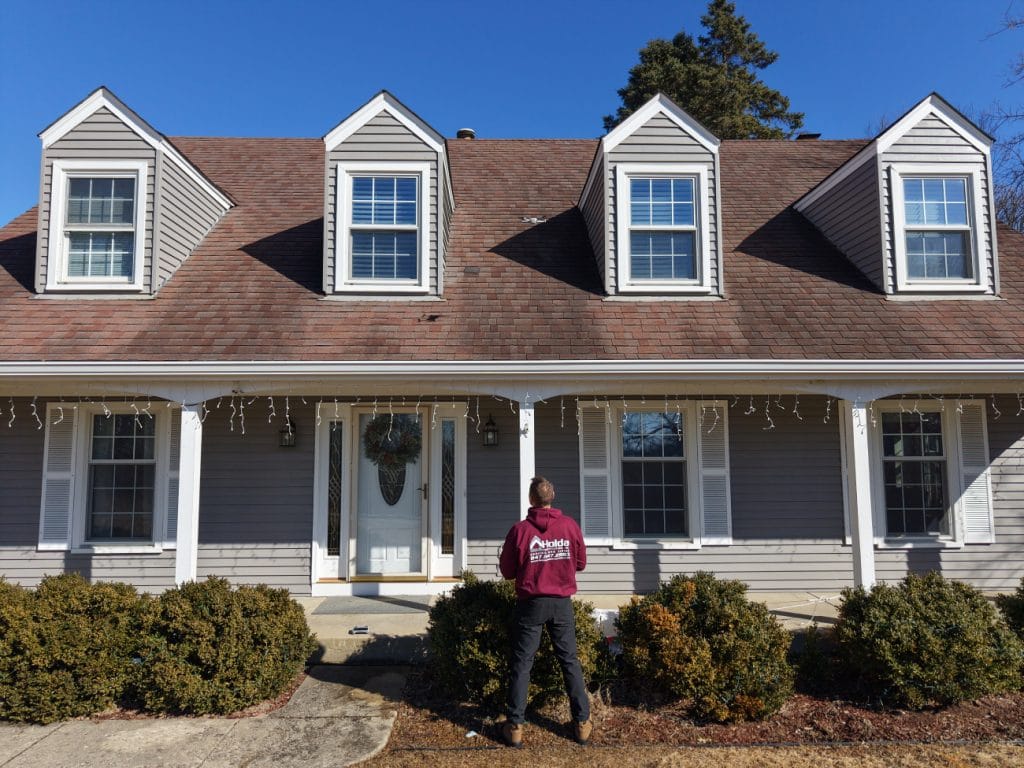
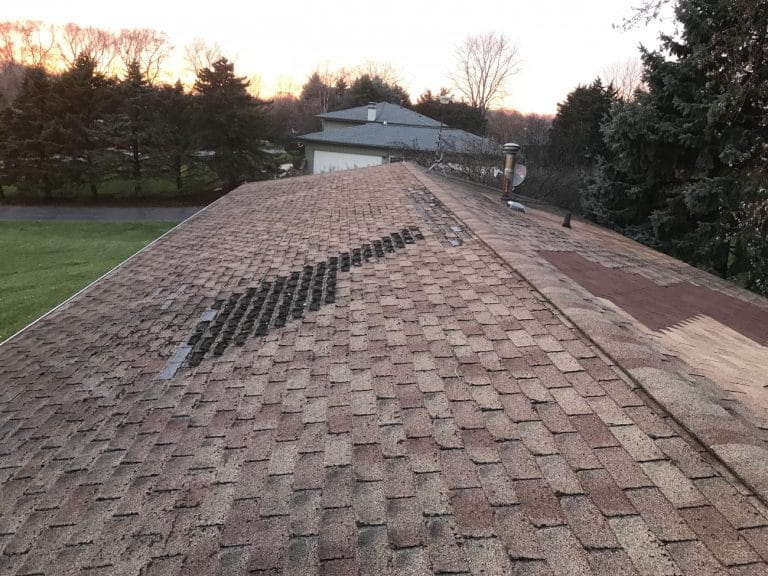
A roof should feel visually balanced. Clean lines, consistent angles, and symmetry from one side to the other. When that balance shifts, it’s often a sign of something deeper.
The simplest way to check is to step back. Stand across the street and view your roofline against the sky. Distance gives you perspective, and perspective makes irregularities easier to see.
As you look, pay attention to:
A well-constructed roof should appear symmetrical. When it doesn’t, there’s usually a reason.
Common causes include:
This is not a cosmetic issue. A sagging roofline is a structural concern.
As the roof weakens, the risk increases, especially under additional load from snow or prolonged moisture. What begins as a subtle dip can progress into something far more serious if left unaddressed.
Interior warning signs often appear alongside it:
If you notice these signs, it’s time to act. A professional assessment is not just recommended, it’s necessary to understand the extent of the issue and prevent further damage.
Some roofing issues can wait for a scheduled inspection. Others cannot.
When certain warning signs appear, they indicate that your roof is no longer protecting your home in the way it should, and the longer they’re left unaddressed, the more serious the consequences become.
1. Active leaking during storms
Water dripping from ceilings or running down walls during rain is a clear sign of failure, especially when it appears in multiple locations at once. This is not just a nuisance. Moisture intrusion at this level can lead to mold growth within 24 to 48 hours, along with damage to insulation, drywall, and structural components.
2. Visible sagging or structural deformation
Any dip, bow, or downward movement in the roofline should be taken seriously. This includes roof decking that appears to sag between rafters when viewed from the attic. These are signs of structural weakening, and under added weight, such as snow or prolonged moisture, the risk of collapse increases.
3. Daylight visible through the roof deck
If you can see light coming through your attic roof boards, outside of intended ventilation openings, the protective barrier has been compromised. Openings like these allow water, wind-driven rain, insects, and even small animals to enter freely.
There are also situations where the damage is immediately obvious and should be treated with the same urgency:
In each of these cases, the priority is not evaluation, but action. A professional assessment should happen as quickly as possible to stabilize the situation and prevent further damage.
Understanding your roof’s age in the Chicago area means looking beyond manufacturer claims and focusing on real-world conditions:
The reason is simple—Chicago’s climate is tough on roofs. With 40–60 freeze-thaw cycles annually, daily temperature swings of 30–50°F (and up to 60–90°F on the roof surface), extreme summer heat reaching 150–170°F, plus storms, snow loads, and humidity, shingles break down faster than expected.
When evaluating whether to repair or replace, the 30% rule is a reliable guideline. If more than 30% of your roof shows damage or significant aging—such as curling shingles or heavy granule loss—a full replacement is usually more cost-effective than ongoing repairs. At that point, you’re not fixing the problem—you’re temporarily patching a system that will continue to fail in other areas.
Some situations require professional attention even if they’re not emergencies.
Schedule an inspection within 1-2 weeks if you notice:
Best timing for non-emergency inspections: Spring (March-May) after winter damage, or Fall (September-November) to prepare for winter. Avoid peak contractor seasons (June-August) for better availability.
When a contractor completes their inspection, don’t let them leave without answers to these questions:
Your roof is your home’s first line of defense against Chicago’s unforgiving climate. Regular inspections, twice a year from the ground, plus professional assessments as your roof ages, help you catch problems early when they’re still affordable to fix.
The key takeaways to remember:
If you’ve noticed any of the warning signs we’ve discussed, or if your roof is approaching 15-20 years old, it’s time for a professional assessment. At Holda Construction, we provide thorough inspections with detailed reports and photographs, so you understand exactly what’s happening with your roof — and what your options are. Feel free to give us a call at 847.847.2883 or reach out online, and we’d be happy to help!
Contact us today to discuss your next project. We’ll be happy to help. Because taking care of small problems is how you protect yourself from larger problems down the road.


